Triangulating and Copying a Surface
The create geometry tool allows for you to triangulate surfaces and lines that have been added to the geometry project. This feature is useful in filling in polylines to make squares or topping off extruded polylines to make cuboids.
We will triangulate two polylines in this section and make a copy of one of the lines to act as a roof for the rooms at the bottom of the hangar image.
First Triangulated Surface
The first triangulation will be for Polyline 03 to make the floor of the hangar:
-
Stay in the 3D Surfaces tab.
-
Select Triangulate Surface from the Surface Type dropdown menu.
-
Leave the name set to Triangulated Surface 01 and Canvas as the System.
-
Choose Polyline 03 from the Line dropdown menu.
-
See that Detect3D has triangulated (visually filled in) the region within Polyline 03 as seen in Image 17 below.
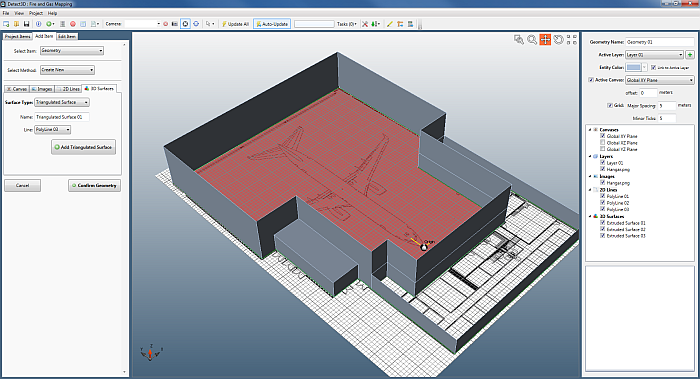
Image 17 - Triangulated ground from Polyline 03
-
Click Add Triangulated Surface to add Triangulated Surface 01 to the geometry project.
Second Triangulated Surface
-
For the second triangulated surface we will add a floor to the set of rooms and then copy it up to the top of the walls. In the Triangulate Surface section choose Polyline 02 from the Line dropdown menu.
-
The red region indicating where the triangulated surface will appear is sometimes hard to view as on the same plane exists the image of the hangar and Triangulated Surface 01.
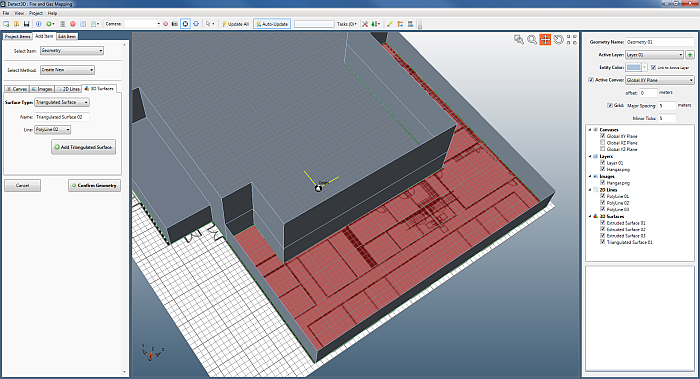
Image 18 - Displaying Triangulated Surface 02 overlaid with the hangar image and other triangulated surface.
- Click Add Triangulated Surface to add Triangulated Surface 02 to the geometry project.
Copied Surface
-
Now that Triangulated Surface 02 has been added, select Copied Surface from the Surface Type: dropdown menu in the 3D Surfaces tab.
-
Choose Triangulated Surface 02 from the Surfaces to Copy list.
-
In the Translation Vector section, enter the values ( 0, 0, 6 ) as the values for delta-x, delta-y, and delta-z, respectively. This copies the triangulated surface up (in the positive z-direction) 6 meters to act as the roof of the rooms of the hangar as shown in Image 19 below. This process is an alternative to selecting the Closed option when extruding surfaces.
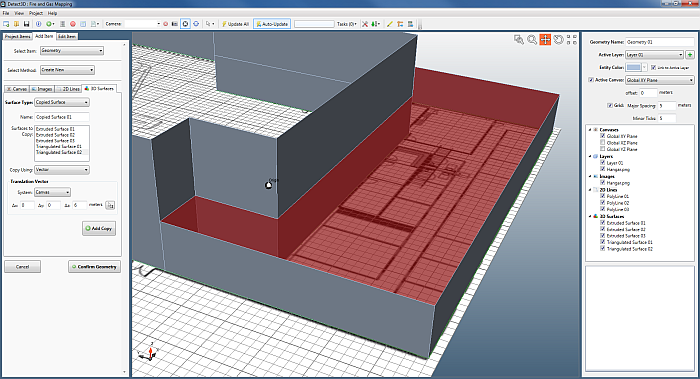
Image 19 - Copied Triangulated Surface 02 to act as the roof of the rooms of the hangar.
-
Click Add Copy to add the roof for the rooms of the hangar.
In the next section we will set layers and names of the geometry project to export into Detect3D.