Navisworks and DWF Files
In 2019 Insight Numerics released an update for importing DWF files into Detect3D. This DWF file can be exported from Navisworks Manage or Navisworks Simulate software. Since Navisworks can import a large variety of CAD formats (including NWD and NWC files) it greatly reduces time spent for conversions. You can obtain a 30-day free trail for Navisworks Simulate from this link: https://www.autodesk.com/products/navisworks/free-trial

To create a dwf file:
-
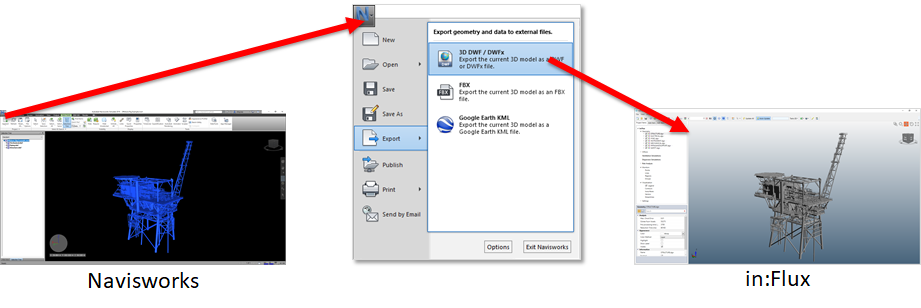
With your CAD model loaded into Navisworks, click the main menu "N" button on the upper left corner of the screen and choose the Export option
-
Select "3D DWF/DWFs" as the format and choose a directory to save the file
-
Once exported, open Detect3D or in:Flux and choose the saved DWF file
-
When the CAD Import Options window appears, ensure that 'meters' is selected - this will match the scaling and coordinates from Navisworks
-
Click the Import button
Dividing Up CAD models in Navisworks
On occasion, clients provide the entire site CAD model for F&G mapping analysis. These files can have sites larger than 1 km in length or with multiple complex offshore decks. Depending on your machine, these files may make it difficult for computers to process the file. Fortunately, Navisworks can also be used to help manage these larger complex CAD files.
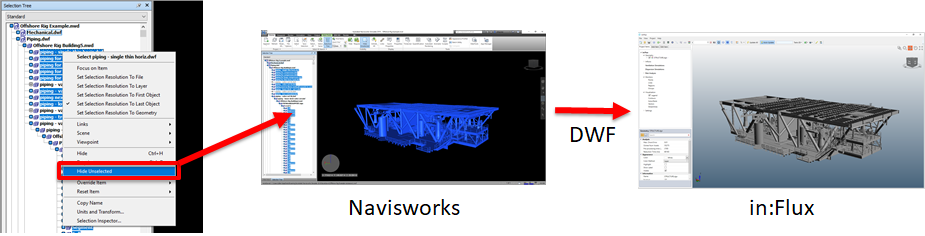
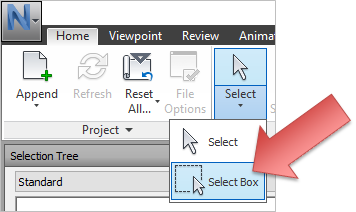
After importing your CAD geometry into Navisworks Manage or Navisworks Simulate, you can select individual layers or equipment pieces from the Selection Tree or highlight sections with the Select Box tool, shown below.
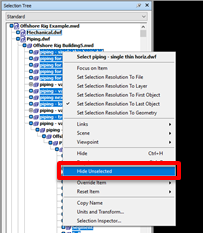
Once desired items have been selected, from the 'Selection Tree' right-click on the blue selected items and choose “Hide Unselected”
Now export the file to DWF using the same steps above, this time only the selected items will be exported. This process can be repeated by un-hiding and re-hiding CAD pieces.