Increasing Resolution
Starting from the Tutorial 1 setup:
-
Select the First Detector name from the project items tree.
-
In the properties panel, scroll down to the Ray Casting header. Change the value on the Angular Resolution row by highlighting 1 and entering a new value of 0.5.
-
Click anywhere on the screen to verify that a new value has been entered. With regards to flame detectors, each value of the Angular Resolution, pertains to the angle at which the ray casting algorithm rotates before casting another ray. Therefore, more rays are cast for a resolution of 0.5 degrees than for a resolution of 1 degree.
-
Notice the First Detector name is now grayed. This means Detect3D has noticed there has been a change to a project item. Click the
 button on the toolbar.
 -
Under the Appearance header of the First Detector properties panel click on or off the varying checkboxes so that Show Direction, Show Model, Show Obstructed FOV, and Visible are selected.
-
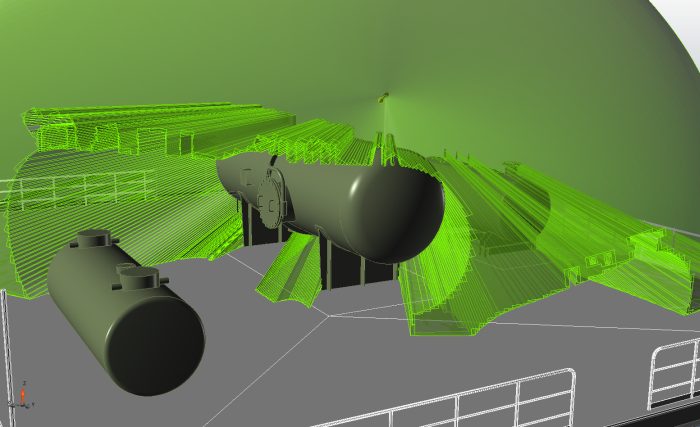
Rotate around the viewport window to view the updated field-of-view. The field-of-view now conforms more to the obstructions.
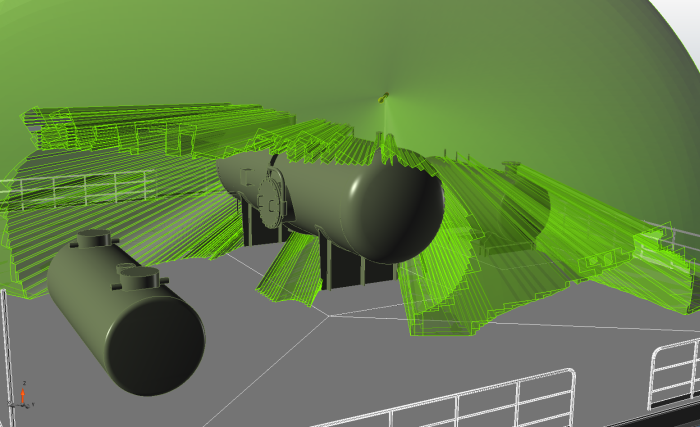
The resulting field-of-view is more defined that the original obtained in the Getting Started Guide. Increasing the resolution of the flame detector field-of-view should be the primary way of increasing accuracy in your Detect3D project. The images below show the increased accuracy from using this process.

Image 1 - Default detector FOV with resolution of 1 degree and 2 levels of refinement (about 45,044 rays)

Image 2 - Default detector FOV with resolution of 0.5 degrees and 2 levels of refinement ( about 134,718 rays)
The process of increasing the resolution can be chosen when adding a flame detector from the Add Item tab, just select the desired resolution from the dropdown menu. Detect3D allows for resolutions up to 0.25 degrees (resulting in about 500,000 rays cast per detector, depending on the detector model used) from the dropdown menu. Note that adding a flame detector with a higher resolution will increase the computation time.