Flame Detector Features
Detect3D allows users to easily change the properties of flame detectors before as well as after they have been added to a project. Three capabilities are described below which will be used later in this section for comparison purposes.
Resolution and Refinement
When adding a flame detector from the Add Item Tab, under the Rays section of an individual detector, the resolution and number of adaptive refinements can be adjusted from the Resolution Drop Down Menu and the Refinements Drop Down Menu, respectively. The Set As Default Button makes the currently selected resolution and refinement the pre-selected values for the next time a flame detector is added to the project.
Once a flame detector has been added to a project, the resolution and refinement can be adjusted in the Ray Casting section of the Properties Panel of the selected flame detector. For coarser resolutions (greater than 2 degrees), a flame detector will need to be initially added to the project and the resolution changed from the properties panel.
Computation time of Fields-of-View
For every flame detector that is added to a project in Detect3D, the time taken to compute the field-of-view is recorded. To view the computation time of a flame detector added to a project select the desired flame detector in the Project Items Tree (see Image 1 below) and the Simulation Time value is displayed in milliseconds under the Ray Casting header in the Properties Panel for the selected flame detector.
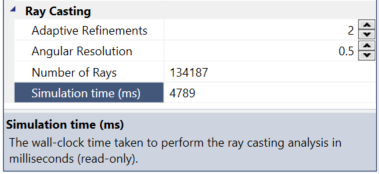
Image 1 - Properties panel of a flame detector displaying the time take to calculate the field-of-view
Copy Flame Detector Resolution
The resolution of one detector can be copied to all the detectors in the project by right-clicking on the detector with the desired resolution and selecting Copy Resolution to All (shown in Image 2 below). This feature is useful to make project-wide changes.
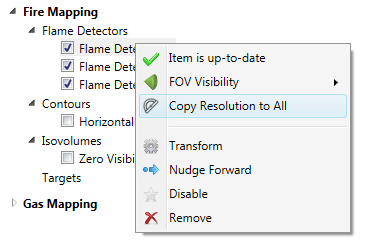
Image 2 - Copy Resolution to All is selected after right-clicking on a flame detector in the project.