Generation of Detector Positioning Report
When creating reports for mapping projects it is helpful to have detector layout and installation information readily available. This information often includes detector positions and orientations. Detect3D can produce PDF and Microsoft Excel documents listing this information as well as notes or comments for each device in an easy-to-read report.
Before generating a report, it is useful to add information about the project.
Project information can be accessed by any of the following ways:
-
Right-clicking Detect3D or Settings in the Project Items tree and selecting Project Information from the menu that appears (shown in Figure 09 below).
-
From the toolbar by selecting the Project Information Icon

-
From the Menu bar by select Project -> Project Information
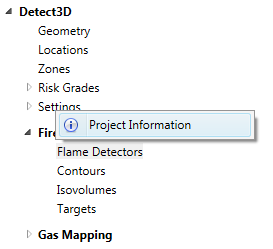
Tutorial 3 - Figure 09 - Upon right-clicking Settings, you can access the project information window
Upon selecting the Project Information option, a window will appear with fields that can be filled out. This information will be present in the cover pages in generated Excel file. For now, enter some text into each of the fields and close the form.
In addition to Project Information, comments can be added to each individual detector within the project. These notes are then exported in reports.
To add a comment to a detector:
-
Select the detector you want to add a comment to from the Project Items tab
-
In the Properties Panel of the selected detector, under the Information section, click inside the textbox next to Comments (highlighted in Figure 10)
-
In the text box add a comment such as "Install with AB001 mounting equipment"
-
The text will be saved and will be exported when reports are made
-
Add a comment to the other two detectors in the project
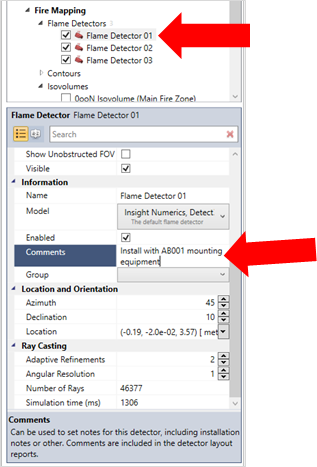
Tutorial 3 - Figure 10 - Adding a comment in the properties panel for Flame Detector 01 to be exported in the reports
To generate a flame detector layout report:
-
Select the Reports Icon
 from the tool bar and choose Flame Detector Layout
 -
Choose a directory to export the document.
-
Title the document "Exported FD Layout"
-
Ensure the Save as type: option is set to Excel Document (*.xlsx)
-
Click Save.
Locate the created Excel file in the directory which it was just saved. The first tab, shown below, is a cover page which includes the Project Information entered earlier as well as a date/time stamp and the version of the software which was used.
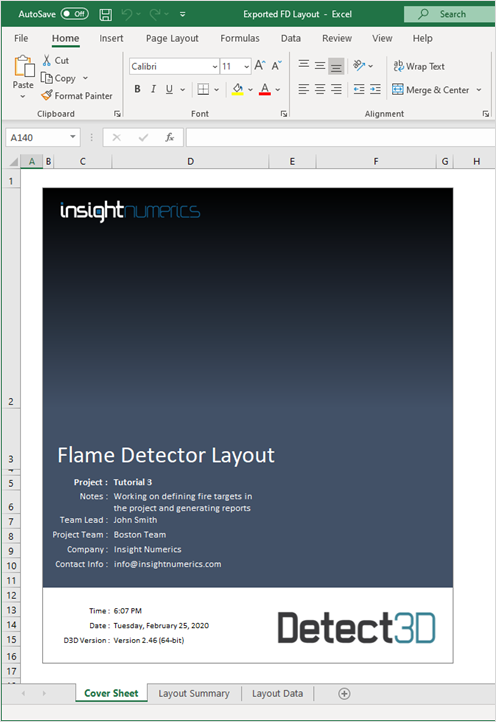
Tutorial 3 - Figure 11 - Cover page of exported Detect3D detector layout
The second tab lists the detectors in formatted table providing the location, orientation, make, model, model description and any comment added to the flame detector. Copying the table associated with an individual detector can be copied to a word document to quickly generate a work pack of detectors to be used as an appendix in a report. This is described in the next section.
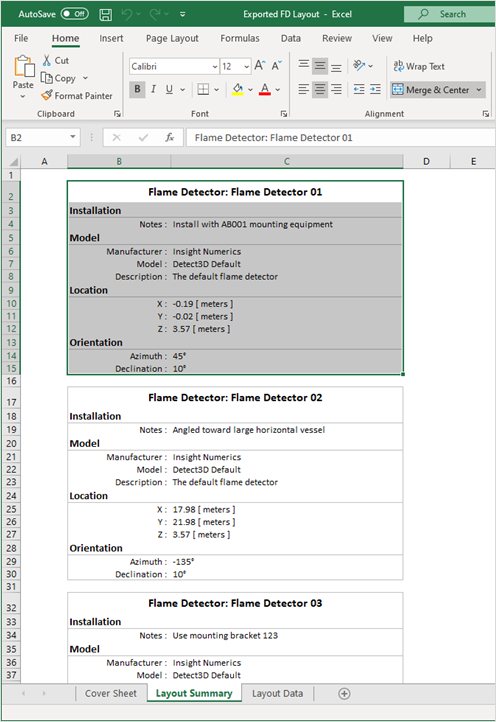
Tutorial 3 - Figure 12 - Layout Summary tab of exported Excel Document
The third and final tab lists the data in a CSV type format so you may manipulate and copy the data to other reporting documents.
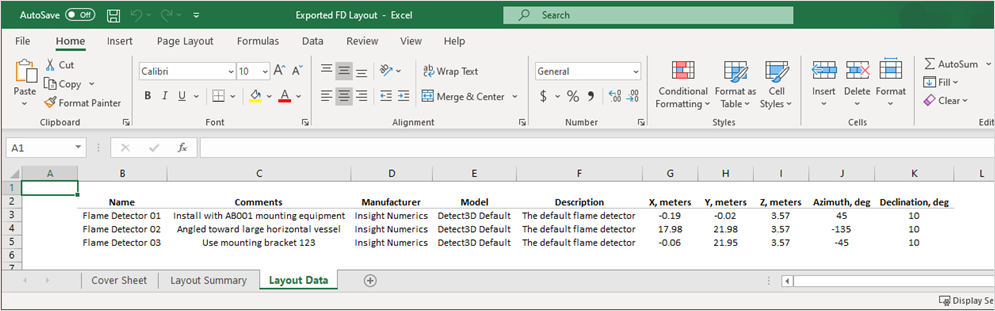
Tutorial 3 - Figure 13 - Layout data for the exported detectors in a CSV format