Third Sub-Zone based on Existing Sub-Zone
The third sub-zone will be defined around Sub-Zone 02, extending an extra meter outward.
-
From the Add Item Tab choose Sub-Zone from the dropdown menu
-
Leave the Name set as "Sub-Zone 03"
-
Set the Zone as Main Zone
-
Select Grade C as the Grade
-
For the Type, select From Existing Sub-Zone.
-
Select Sub-Zone 02 as the Use Same Basis As option
-
Set the Radius to "2 meters". As the basis sub-zone is one defined with the equipment pick tool, the radius value is based on distance from the equipment.
-
Click the Add Item button to add the third sub-zone to the project.
Return to the Project Items tab and toggle on the visibility of Sub-Zone 03 as well as the Structure layer of the geometry. The resulting image should resemble Figure 18 below.
Three sub-zones have now been defined, with each contained within the Main Zone. Meaning if any sub-zone is defined to extend beyond the limits of its parent zone then it will be cut off.

Tutorial 4 - Figure 18 - Detect3D window showing the three sub-zones added to the project
Notice that Sub-Zone 01 overlaps with Sub-Zone 03. in Detect3D, each sub-zone is independent and can overlap or fully encompass another sub-zone without affecting its own coverage. For the below example coverage will be displayed for Sub-Zone 01 ignoring the Sub-Zone 03 region, and vice versa.
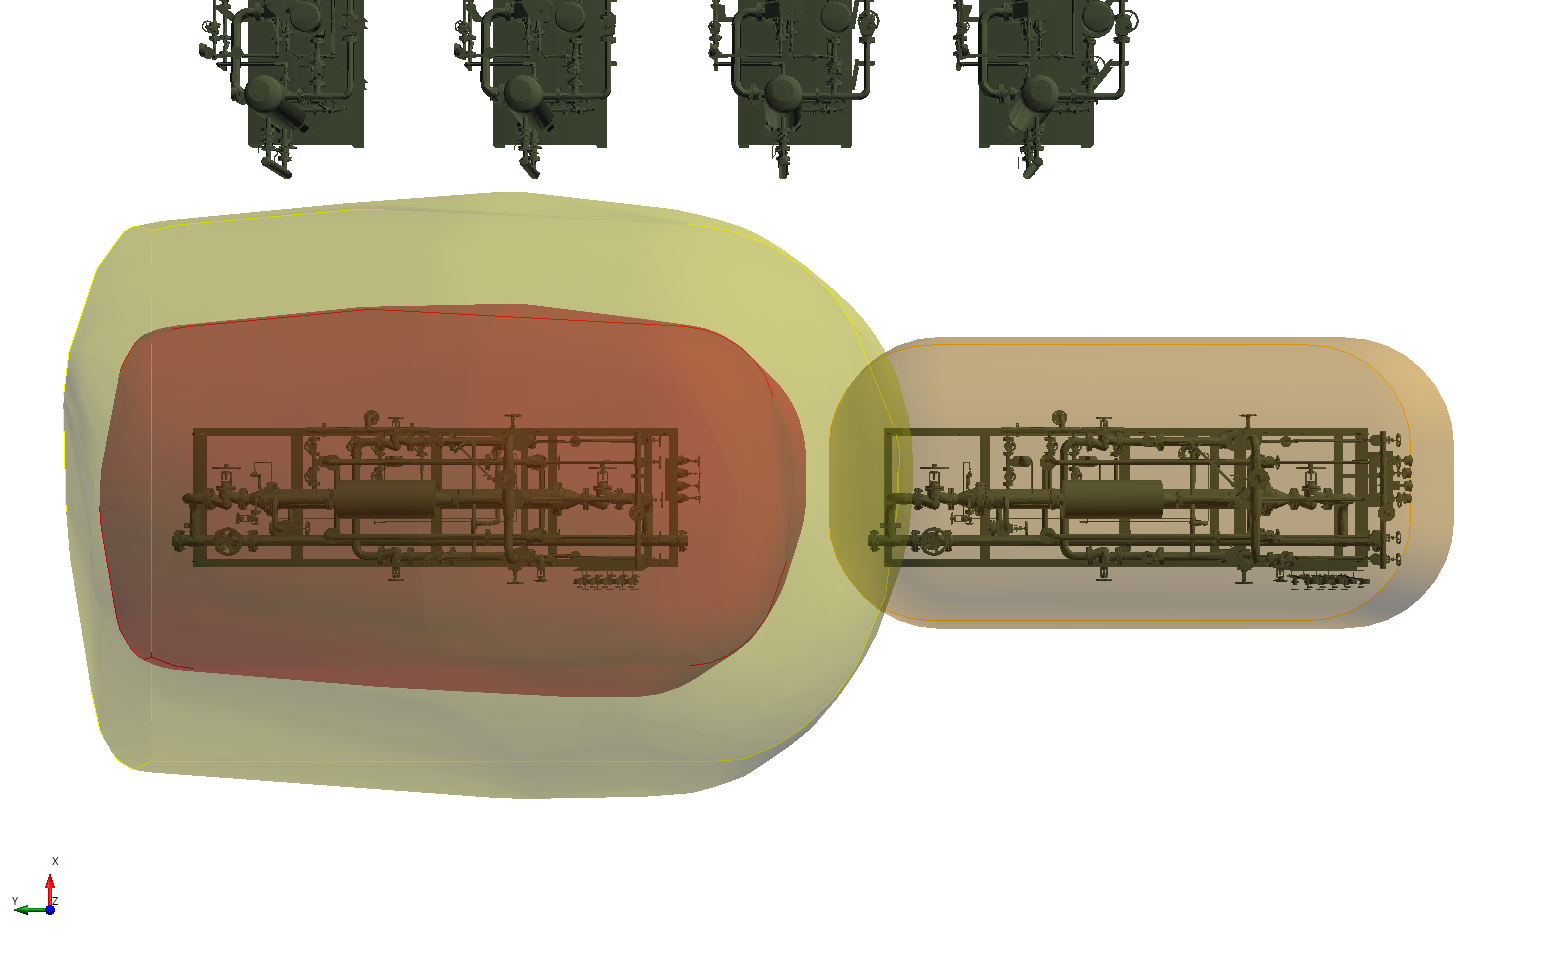
Tutorial 4 - Figure 19 - A 'Top View' of the sub-zones indicating the overlapping of Sub-Zone 01 and Sub-Zone 03. This will not affect individual sub-zone coverage calculations.
Turn off the visibility of all the sub-zones by deselecting the check boxes next to their names in the Project Items Tree before continuing to the next section.