Editing an Existing Risk Grade
For the purposes of this tutorial the Default Risk Grade will be edited but a new grade grade can be added instead:
-
From the project items tree, click the Default Risk Grade to have its properties panel shown.
-
The last listing in the Performance Requirements section is Gas Type, change the option to Toxic
-
Click once in the 3D Window to confirm the change

Tutorial 8 - Figure 02 - Changing a Risk Grade's Gas Type to Toxic
The gas detectors in the project will now be grayed out as in the image below. This happens as Detect3D allows for both combustible and toxic gas detectors to be added in the same project, but changing the risk grade type does not change already defined gas detectors. In Tutorial 2, the gas detectors were defined with the Type set to Combustible as seen by the small cloud icon with a flame (![]() ) next to the gas detectors name.
) next to the gas detectors name.
When the gas type was changed, Detect3D recognizes there is a difference in the visible risk grade and the gas detector type and indicates this difference with a gray field-of-influence (FOI).
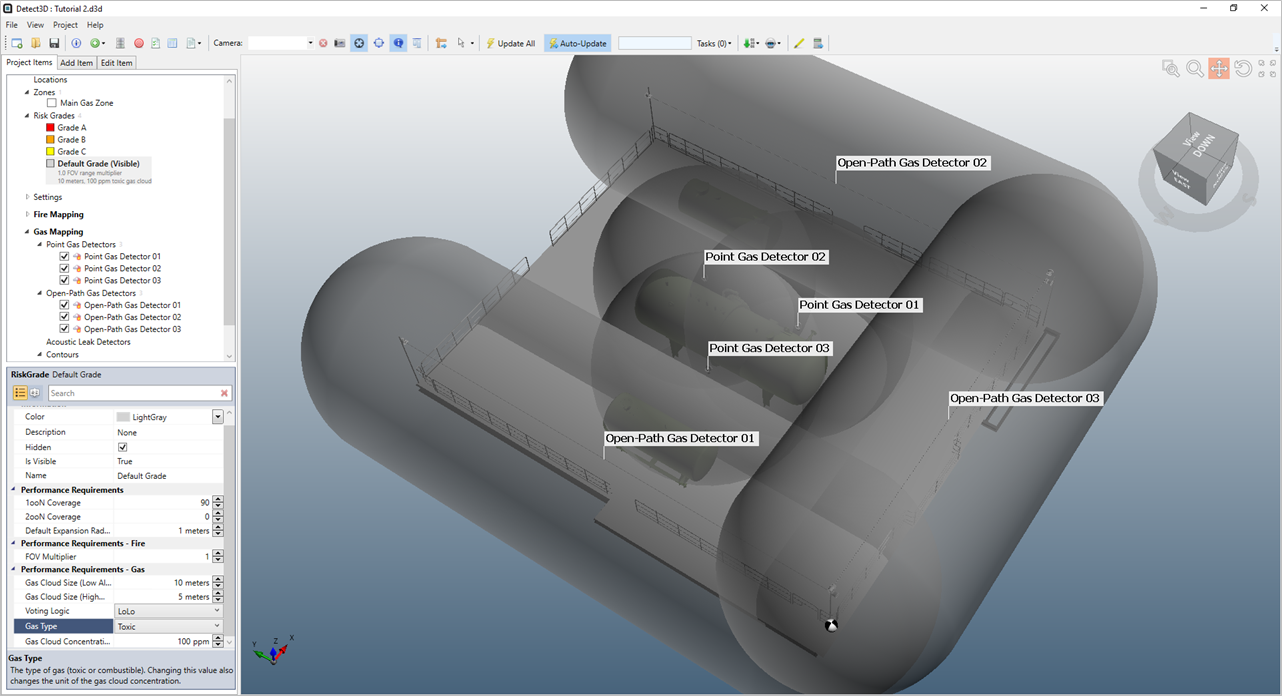
Tutorial 8 - Figure 03 - Grayed out gas detectors FOI when the gas type of the visible risk grade was change
To change a gas detector's type:
-
Select an existing gas detector from the project items tree, under the Analysis section of the gas detector's properties panel, change the Gas Detector Type to Toxic. This will turn the text of the selected detector gray and the FOI a yellow color. Notice now the small icon next to the detector name has changed to have a small toxic sign next to it

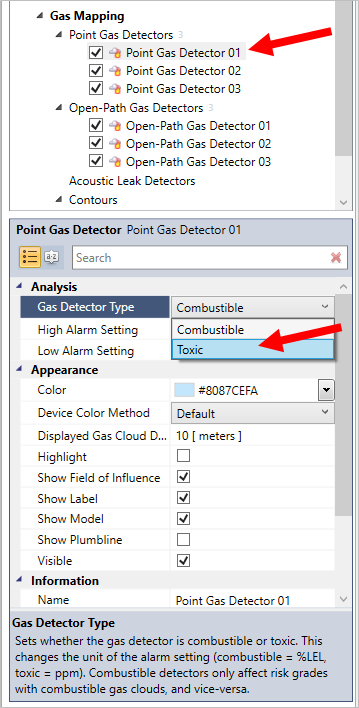
Tutorial 8 - Figure 04 - Changing a defined gas detector's gas type
-
Repeat Step 1 for each detector in the project by changing each of the gas types from combustible to Toxic in their respective property panels.
-
Press Update All on the toolbar to update all of the gas detectors to a toxic type. Your Detect3D window should be similar to the below

Tutorial 8 - Figure 05 - Updated project with risk grade set for toxic gas mapping and previously defined gas detectors set as toxic devices