Reviewing Updated Coverage Results
Having changed the gas detectors to be of a toxic gas type, we can now look at the coverage results for the toxic analysis.
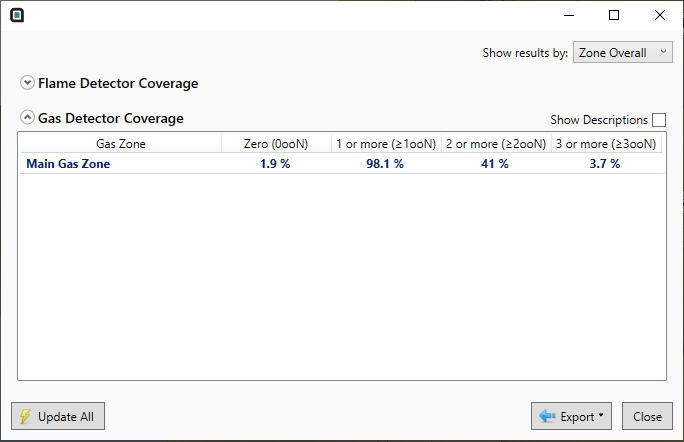
Click the Show Coverage Results button ![]() from the toolbar to open the coverage results table. Here the values are displaying the results of the Main Gas Zone which has the Default Risk Grade applied which has a gas type set to toxic. The gas detectors in the project are also of a toxic type. If not all detectors had the same gas type assigned or the risk grade of the zone was set to a different gas type then the coverage results will be incorrect and possibly show 100% 0ooN depending on the settings applied.
from the toolbar to open the coverage results table. Here the values are displaying the results of the Main Gas Zone which has the Default Risk Grade applied which has a gas type set to toxic. The gas detectors in the project are also of a toxic type. If not all detectors had the same gas type assigned or the risk grade of the zone was set to a different gas type then the coverage results will be incorrect and possibly show 100% 0ooN depending on the settings applied.

Tutorial 8 - Figure 07 - Coverage Results Table for Tutorial 8 toxic gas mapping
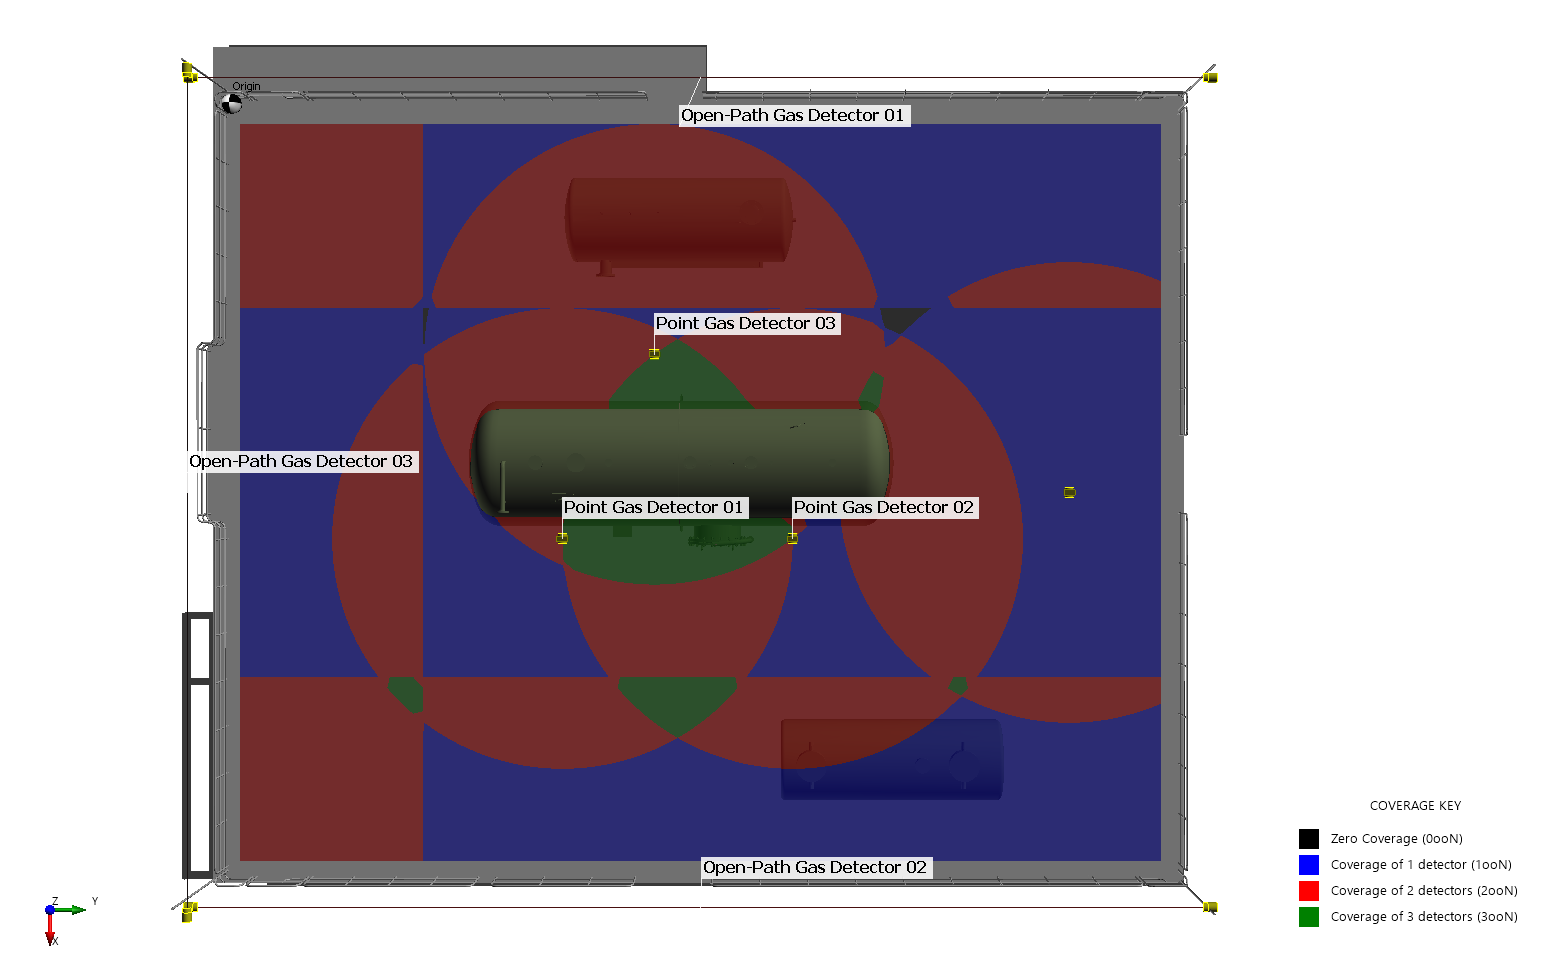
As the Visible Risk Grade was set to be for toxic mapping, the contours of the project will have been updated to reflect the coverage of the toxic gas detectors.

Tutorial 8 - Figure 08 - Updated contour for toxic gas detectors of the project
This concludes Tutorial 8. You should now have an understanding of how to change detectors to be of a toxic gas type.
Remember that to change the analysis to toxic you need to ensure three things:
-
The detector's gas type is set to Toxic
-
The visible risk grade has its Gas Type set to Toxic
-
The zone used for the analysis has the "toxic" risk grade assigned to it.
Only if the three criteria above are met will toxic coverages be accurately represented in the analysis.
When you have finished viewing the results close the project.