Adding an Acoustic Detector
Using the two variables discussed earlier, an acoustic detector will be added to the project:
-
Select Acoustic Leak Detector from the dropdown menu in the Add Item tab.
-
Set the Name of the detector as "Acoustic Leak Detector 01"
-
For the Location of the detector enter the coordinates as ( 10, 7, 3 )
-
Set the Azimuth and Elevation values to "0 degrees"
-
Enter the Range to be "12 meters"
-
Set the Up Range to "4 meters"
-
Click the Preview check box to see that the detector is positioned near the large middle tank and next to the Point Gas Detector 01 as shown below
-
Click Add Item to add the detector to the project, the field of influence will appear with a transparent purple color
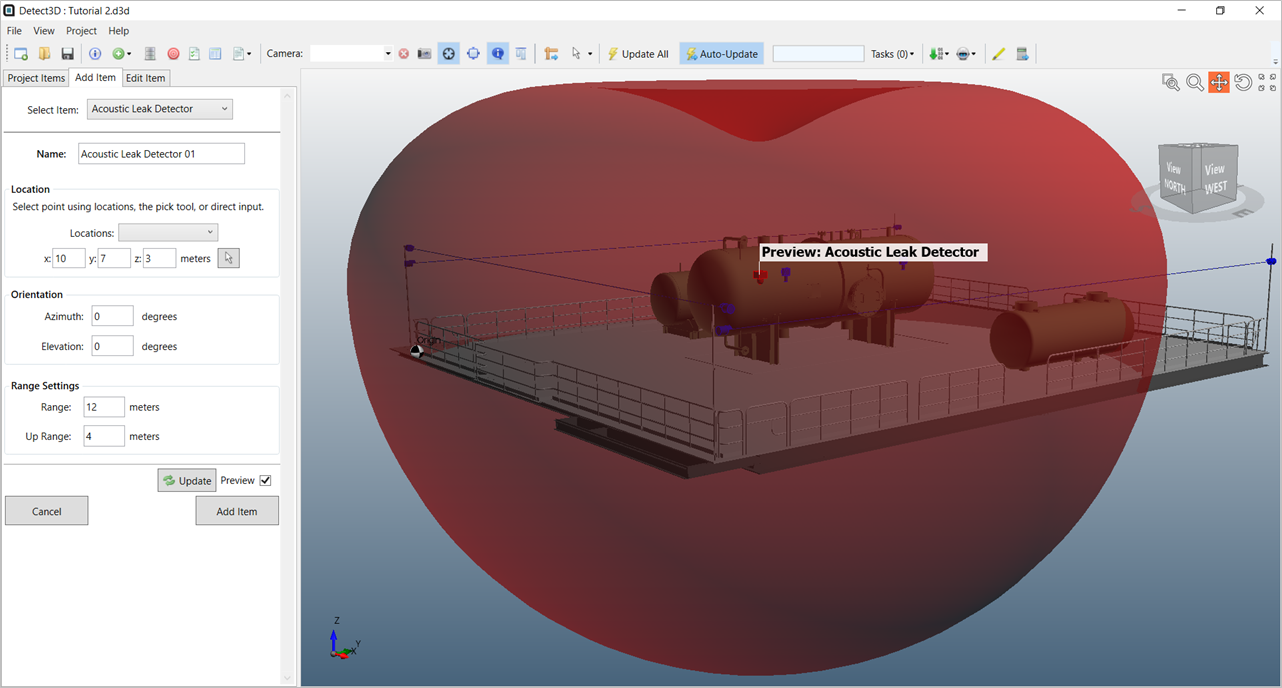
Tutorial 9 - Figure 05 - Preview of the Acoustic Leak Detector to be added to the project