Detector Database Import/Export
The Detector Database can be accessed in one of two ways:
-
From the toolbar, selecting Project -> Detector Database
-
Selecting the Flame Detector Model Database icon
 on the tool strip menu.
Below is an image of the Detector Database window. Here, starred FOV models will show up in the dropdown menu options when selecting to change or add a new detector. You may also search the Manufacturer's Database and 'star' devices most applicable for your project. Starred models will be available from the dropdown menus in the Project Items and Add Items tabs.
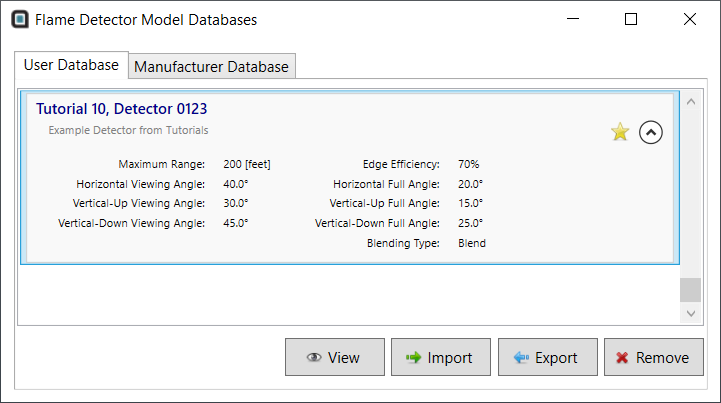
Tutorial 10 - Figure 15 - Detector Database with the FOV model for Tutorial 10 added
In this window you can click the view button to see a top and side view of the curvature and ranges of the model, export a single detector, import a detector, or delete a detector.
Practice exporting and importing a flame detector model:
-
Make sure the Tutorial 10 - Detector 0123 is selected and click the Export button.
-
Choose a name and location to save the detector model
-
Select the Tutorial 10 - Detector 0123 model and click the Delete button. Click OK on the popup window to remove the model from the database.
-
Click the Import button and navigate to the location of the exported detector model (file type of .d3dModel or .xml), select Open.
-
Click OK to acknowledge that a detector model has been imported.
You have now finished Tutorial 10 and should have an understanding of how to create a flame detector model, export a model from the Detector Database, removed a model from the Detector Database, and how to import a model to the Detector Database.