Editing the Fire Area Region Size
Once defined, users may edit the size of the Fire Area Region via the properties panel of the defined zone. The following steps will change the units of the Fire Area box from feet to meters, but you may opt to change the values of the width and height instead.
-
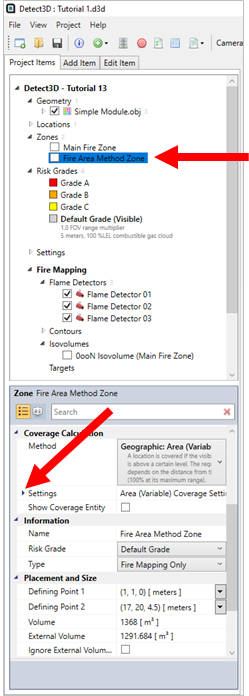
Select the Fire Area Method Zone in the Project Items Tab
-
In the properties panel, click the small arrow next to the Settings of the Coverage Calculation as shown in the figure below. This will expand the Fire Area Method settings section, here we can change the entered dimensions.

Tutorial 13 - Figure 07 - Location of changing the Fire Area Region size via the properties panel
-
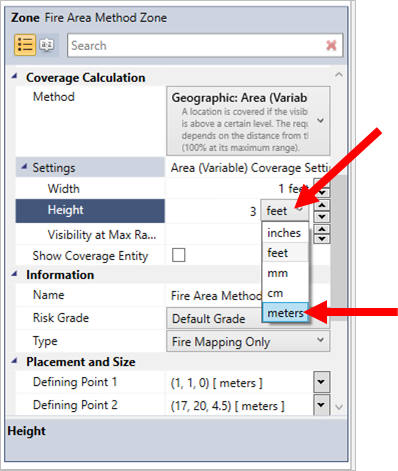
In the options that appear, select the "feet" text next to the Height dimension and change this to "meters" as shown below.

Tutorial 13 - Figure 08 - changing the units of the Fire Area Region
-
Repeat Step 3 for the Width, this will change the dimensions of the box associated with the Fire Area to now be "1m x 3m" in size.
-
Click once in the 3D window to verify the new entry. This will turn the text of the Fire Area Method Zone gray indicating that something has been changed in the zone.
-
Click the "Update All" button (
 ) on the toolbar to recalculate the coverage results for the new Fire Area Region size.
-
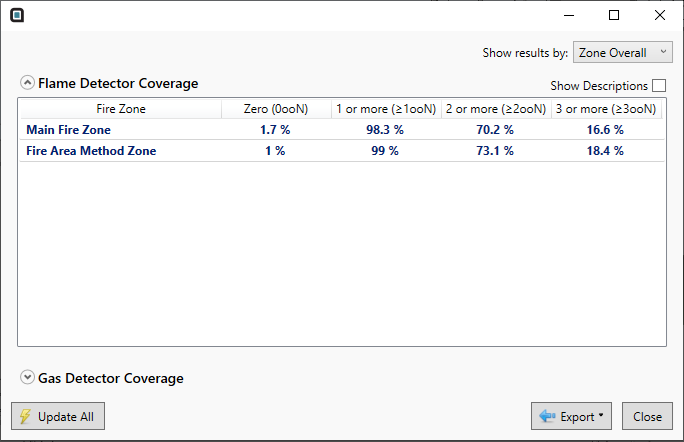
The coverage results will be recalculated and the coverage table will be updated and should be similar to Figure 9 below.

Tutorial 13 - Figure 09 - Updated coverage results for larger Fire Area Region size
-
Repeat Steps 1 - 5 and change the units to "inches" rather than "meters". This will result in a significantly smaller Fire Area size.
-
Click the Update All button (
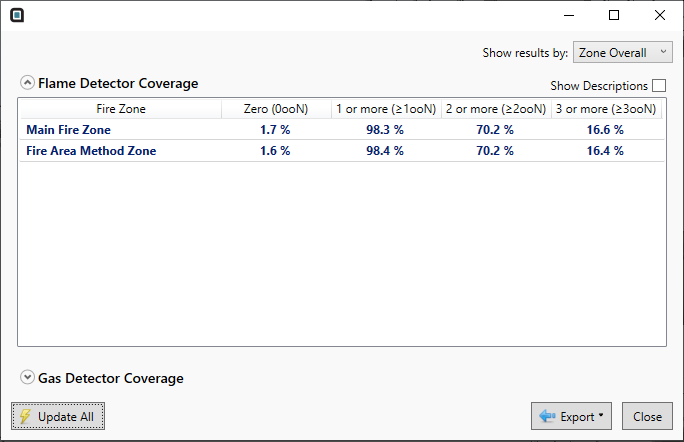
 ) and see that now the coverage values are fairly similar to the Point Method. This can be expected as the Fire Area size
reduces. If reduction continues in this way, coverage will eventually converge to the coverage of the Point Method.

Tutorial 13 - Figure 10 - updated coverage results for a 1in x 3in Fire Area Region size.
-
Repeat Steps 1 through 6 another time to return the dimensions of the Fire Area to be 1m Width and 3m Height and continue to the next section.