Exporting Images
Any view of the 3D window can be saved as an image or copied directly to your clipboard of your computer for exporting. The majority of the images in this documentation were exported directly from in:Flux using the 'copy to clipboard' capability described below.
To export an image:
-
Right-click within the 3D window
-
Select Copy to Clipboard (alternatively, you can select the same from the View Menu).
-
In the window that appears, shown in Figure 30, enter the desired dimensions of your image, the values will automatically be filled based on the resolution of your screen.
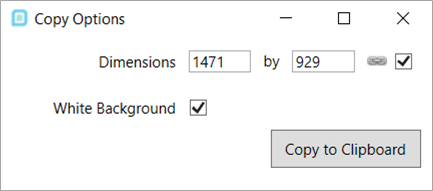
Tutorial 1 - Figure 31 - Window that appears for selecting the properties of the image to be added to the clipboard.
-
There are two options for the background color of the image
-
A white background, which is the default option, will exist if the check box next to White Background is selected
-
The alternative is to have the background of the copied image to be identical to the background of the 3D window.
-
-
Click Copy to Clipboard to attach the image of the 3D window to your computer's clipboard. Paste the image in your preferred reporting software, such as Microsoft Word or PowerPoint.
A shortcut for screenshots is to click once within the 3D window and then press Ctrl+C. This will automatically put a screenshot of the 3D window onto your computers clipboard for pasting in other software. This shortcut will not show the window in Figure 30.
Congratulations! You have finished your first full CFD ventilation simulation with in:Flux.
Save your Tutorial 1 file as it will be used as a starting point for Tutorial 2.