Adding a Grid of Monitor Points
After individually placing monitor points, we will add a grid of monitor points across the facility.
-
Click the Add Item tab and select Monitor Point from the dropdown menu
-
Change the Name to "Monitor Point Grid 01". in:Flux will automatically start to increment the numbers of project items - if you don't change the name here the name will appear as Monitor Point 03 (as two monitor points have already been defined).
-
Select Area Spaced as the Method
-
Set the first point at the origin with the X value as "0", the Y value as "0", but the Z value set to "4" as this will position all the points to be at a 4 meter height.
-
For the second point, enter an X value of "20" and a Y value of "39".
Set the # of Points X: to "5" and the # Points Y: to "5" which will result in 25 monitor points. The Add Items panel should appear as Figure 05 below.
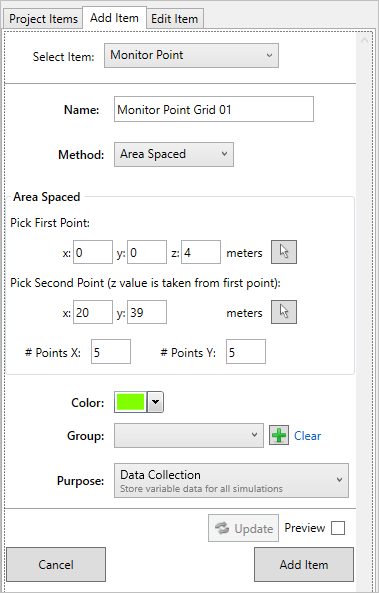
Tutorial 3 - Figure 05 - Indication of the entered data for the Monitor Point Grid
-
For the series of monitor points, set the Color to Blue by clicking the color dropdown menu and selecting the blue swatch (
 ) from the color palate, shown in Figure 06.
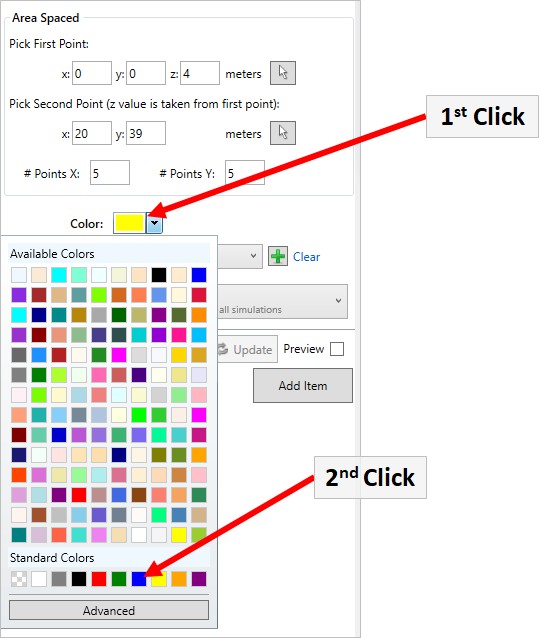
Tutorial 3 - Figure 06 - Selection of color swatch for the monitor point grid
-
Set the Purpose as Data Collection to store variable data.
-
Check the Preview checkbox to ensure the points are in similar locations as Figure 07 below and span across the process area and walkway.
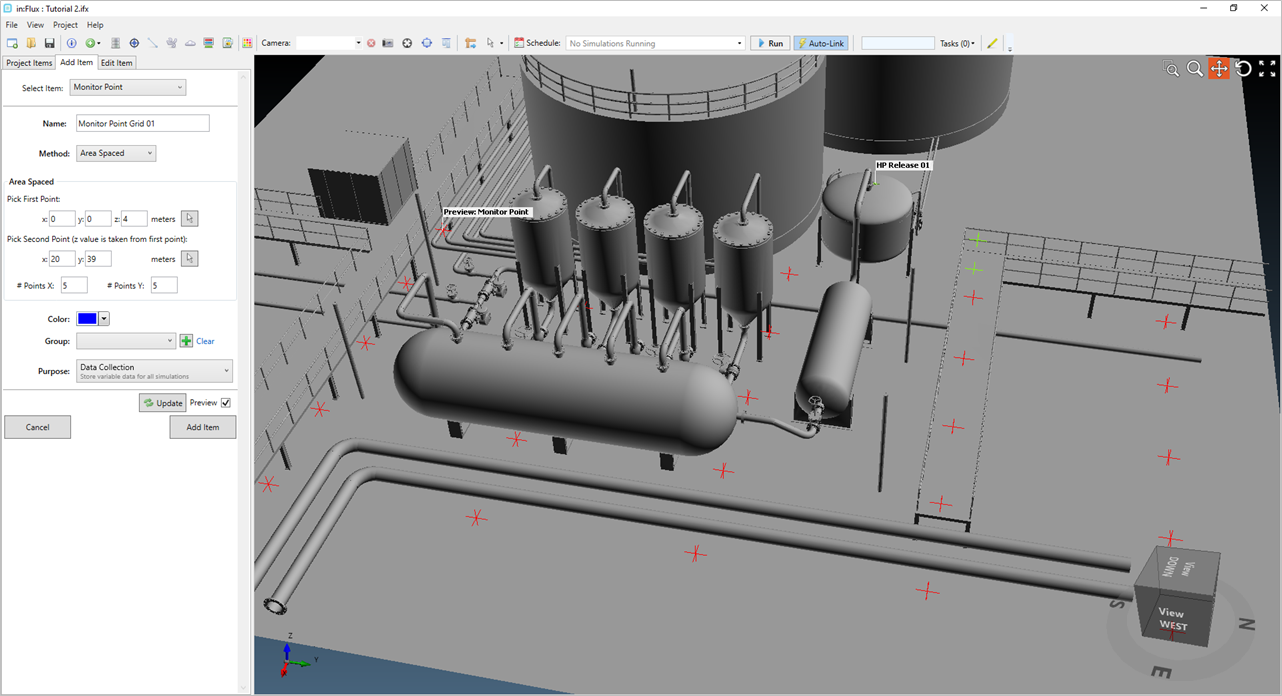
Tutorial 3 - Figure 07 - Preview of Monitor Point Grid defined across the facility
-
Click the Add Item to add the 25 additional monitor points to the project.
All 27 monitor points will now be visible under the Monitors -> Points header in the Project Items tab as shown below. The monitor points will have a gray text as they have yet to be updated with simulation information which will be discussed in the next section. If the monitor point names have black text, check that the Purpose is set to Data Collection. All monitor points can have their purpose changed at the same time by right-clicking the Points text in the Project Items Tab and selecting Set All Monitor Purpose To...
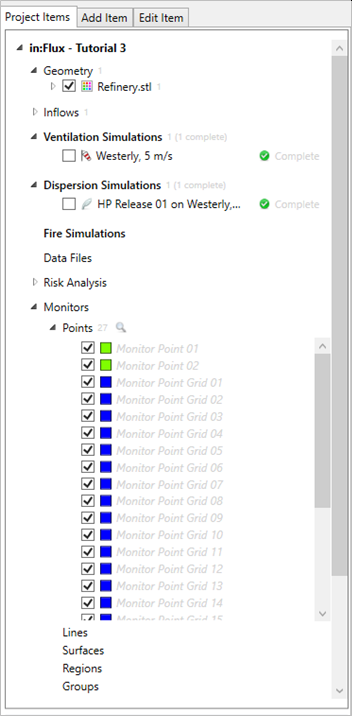
Tutorial 3 - Figure 08 - List of 27 added monitor points to the Project Items tab.
Continue to the next section to update and review the monitor point data.