Adding an Inflow with Depressurization and Blowdown
In the same way as a leak with ESD can be added to a project, a blowdown time and inventory volume of gas can be entered for an inflow.
To add a blowdown time and inventory to a leak:
-
From the Add Items tab, select Gas Leak or Emission as the Select Item
-
Ensure the Type is High Pressure Gas Leak and then enter a Name of "HP Release 01 with ESD, BD and Inventory"
-
From the Template dropdown options, choose HP Release 01 with ESD. As before, the properties and location of the leak will be copied to all of the text boxes in the panel.
-
In the Isolation and Depressurization section, enter an Inventory of "50 m3"
-
The Shutdown (ESD) Time of "10 seconds" should already be entered, as it was taken from the properties of HP Release 01 with ESD.
-
Enter a value of "30 seconds" as the Blowdown (BD) Time
-
Set the BD Valve Diameter to "100mm"
-
Look at the Transient Profile Graph by clicking the green graph icon (
 ). In contrast to the inflow with just an ESD, we see how the pressure of the release decays from time of shutdown and more drastically after blowdown.
Tutorial 8 - Figure 23 - Transient Profile Graph showing shutdown, blowdown and decaying pressure with time
-
There are several variables that can be viewed in the transient profile graph. Change the Variable of the transient profile graph to Mass Flow Rate, kg/s, shown below.

Tutorial 8 - Figure 24 - Mass flow rate values of the transient HP Release 01 with ESD, BD and Inventory
-
Click the Add Item button to add the HP Release 01 with ESD, BD and Inventory to the project.
After the inflow is added to the Project Items tab you can still view the transient profile graph by right-clicking the inflow and choosing View Transient Profile.
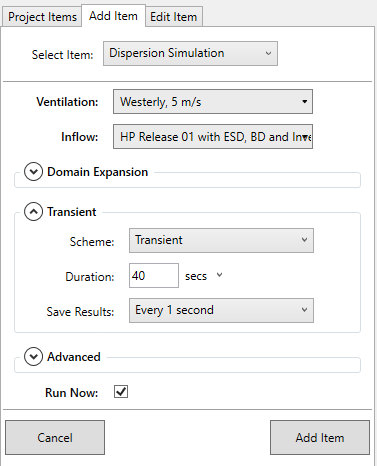
The setup for the dispersion case with the ESD, BD and inventory inflow is the same as in the prior section:
-
Choose the HP Release 01 with ESD and Inventory as the Inflow option for the dispersion and the Scheme will automatically be set to Transient.
-
Enter a Duration of "40 seconds" and save at Every 1 second.
-
Your screen should be similar to Figure 25 below. Click Add Item to start the dispersion calculation.

Tutorial 8 - Figure 25 - setup for transient dispersion case with HP Release 01 with ESD, BD and Inventory