Transient Contours
You will notice that when you select the Simulation to be HP Release 01 on Westerly, 5 m/s with the transient information that a new dropdown option will appear titled Time Step. The last time step will be showing in the dropdown menu, for this case that will be 40s.
Clicking the Time Step dropdown menu will allow for any of the time steps to be selected for the contour. This will also be applicable for other visualizations.

Tutorial 8 - Figure 04 - options for the selecting the time step to display for the contour of the transient simulation
For this example, preview the %LFL contour at 40s:
-
Set the Variable to Methane Volume Fraction, %LFL
-
Enter the Offset of the contour to the height of the leak at "5.94 meters"
-
Click the Coloring dropdown arrow and set the Range to User-Defined. Enter the Min value to be "0" and Max value to "100"
-
Click the Preview checkbox, your screen should resemble the figure below. Here the transient simulation (at the end of the 40 seconds) is similar to that of a steady state simulation.

Tutorial 8 - Figure 05 - Preview of the %LFL contour at a time step of 40s
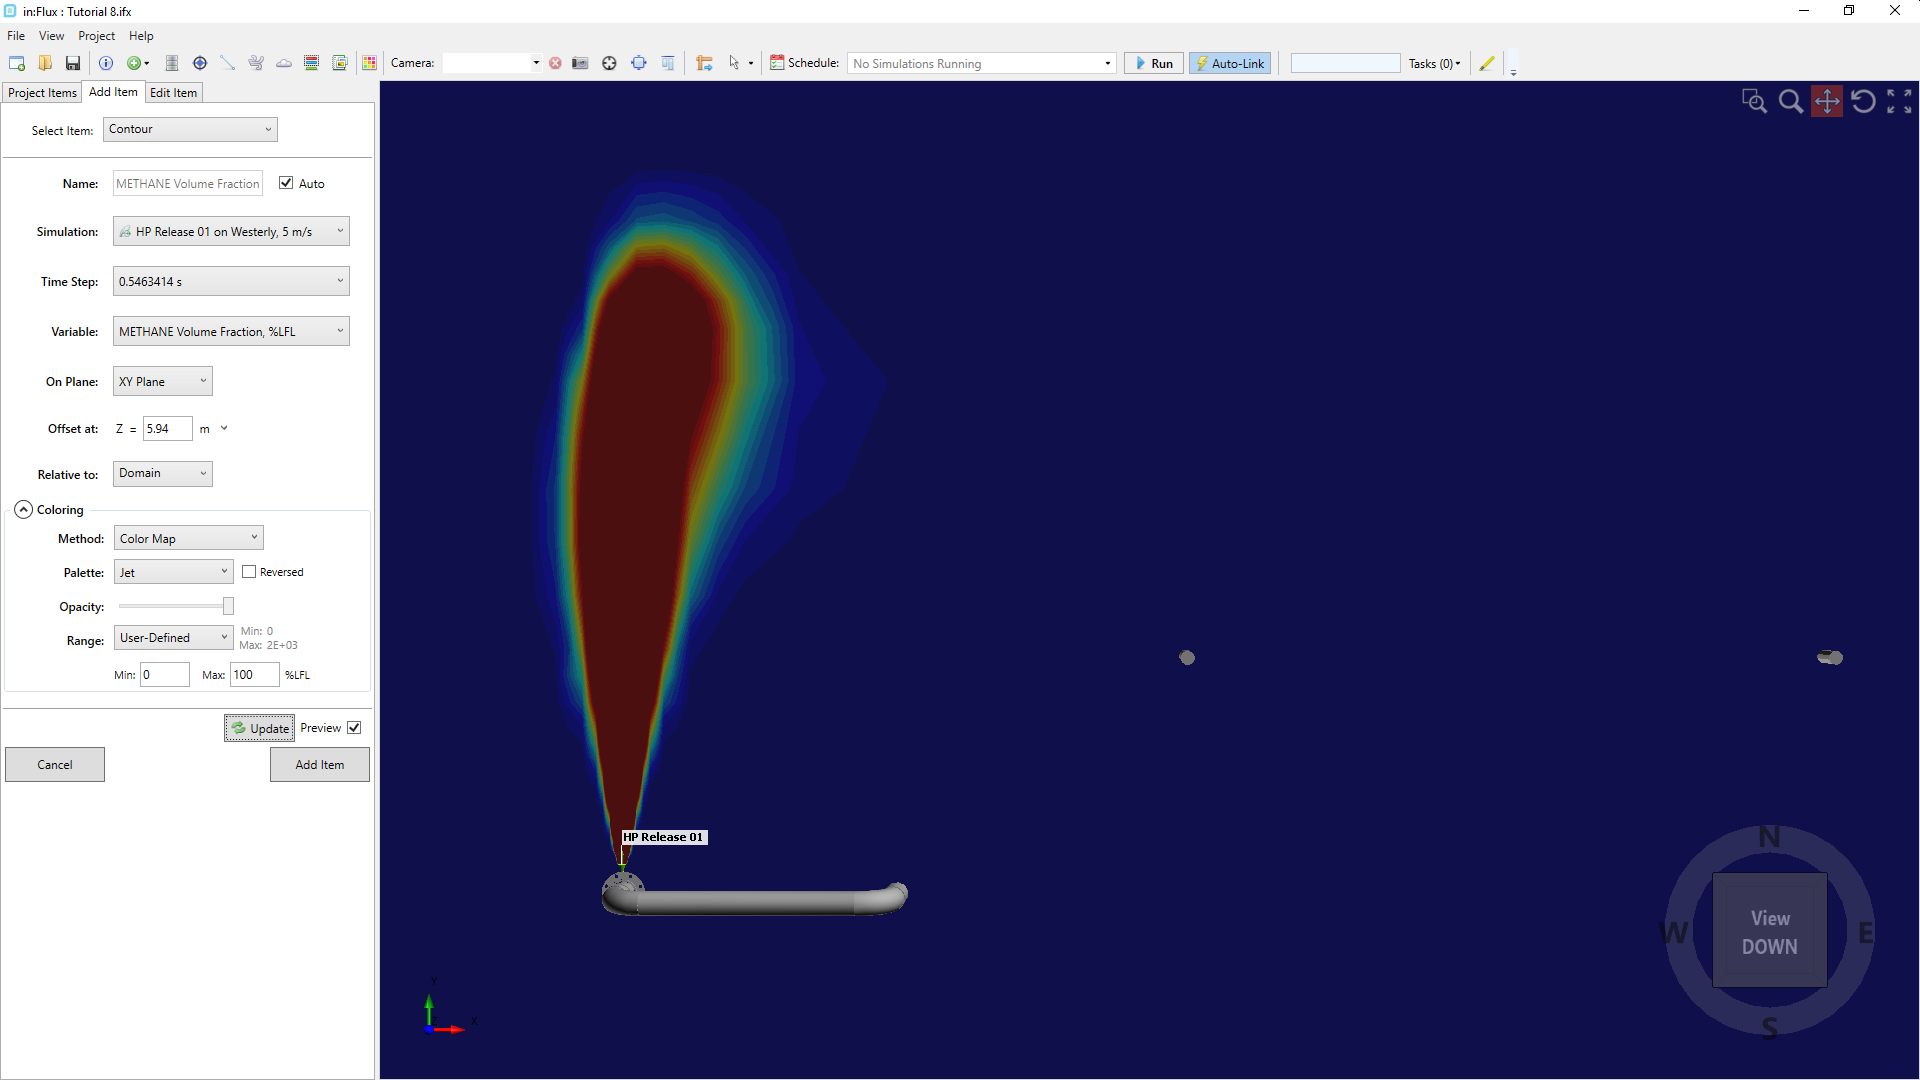
5. Change the Time Step to the value near 0.54s after a moment, the contour will automatically update. A much different profile exists for the mass fraction at the initial stages.

Tutorial 8 - Figure 06 - Preview of the %LFL contour at a time step of 0.54s
6. Click the Add Item button to add the contour at the 0.54s time step to the project. Note that you may change the time step value after the contour has been added to the project via its properties panel.