Transient Monitor Point Data
As this Tutorial started by importing the Tutorial 3 file, monitor point data will have already been updated with the transient simulation.
-
Open the Monitor Point Data window by selecting the
 icon from the toolbar or Project Menu.
 -
From the Variable dropdown menu in the upper left-hand corner, select Methane Volume Fraction, %LFL.
-
Select the cell corresponding to Monitor Point 02 and the transient simulation. Ventilation Simulations will have a wind sock icon (
 ), steady state dispersions will have a gas leak icon (
 ) and transient cases will
have a gas leak with a clock icon (
) and transient cases will
have a gas leak with a clock icon ( ).
).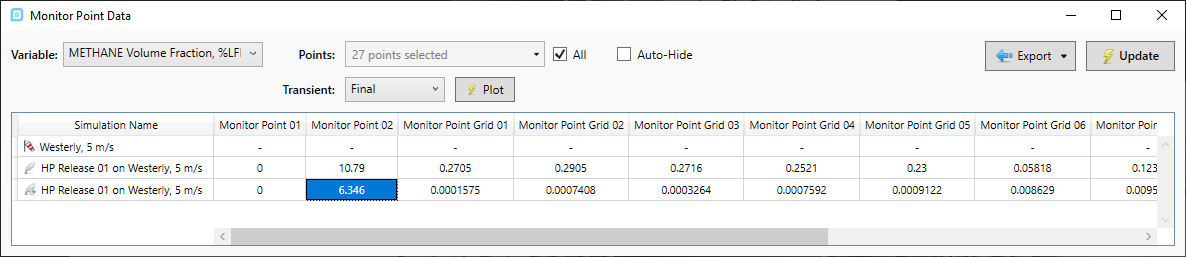
Tutorial 8 - Figure 10 - Monitor Point Data Window with a transient simulation
-
Double-click the cell or click the plot button
 . A graph similar to the figure below will appear.
Here we can see how the concentration changed with time. This can be repeated for any monitor point in the simulation. You may also add monitor points after the simulation has completed and review the data, however
for transient simulations it may take a few seconds to update the Monitor Point Data window. The graph in Figure 11 has a sharp increase in LFL within the first 3 seconds of the starting time, this is due to the starting vortex of the
flow and the monitor point being directly in the path of the release.
. A graph similar to the figure below will appear.
Here we can see how the concentration changed with time. This can be repeated for any monitor point in the simulation. You may also add monitor points after the simulation has completed and review the data, however
for transient simulations it may take a few seconds to update the Monitor Point Data window. The graph in Figure 11 has a sharp increase in LFL within the first 3 seconds of the starting time, this is due to the starting vortex of the
flow and the monitor point being directly in the path of the release.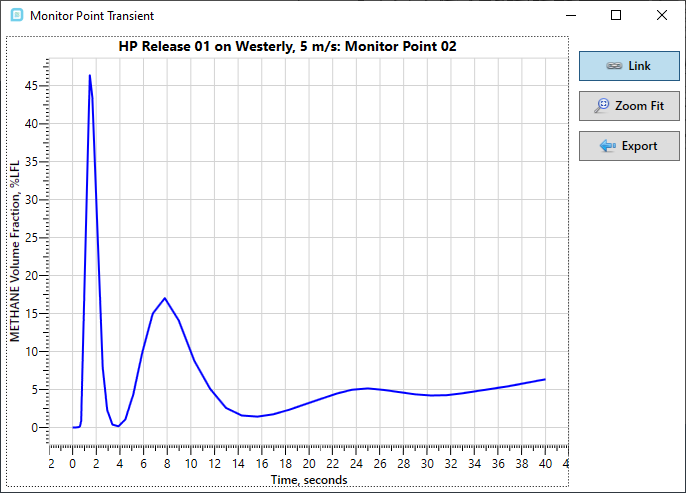
Tutorial 8 - Figure 11 - Graph of %LFL vs time for Monitor Point 02
-
Click the cell in the Monitor Point Data Window corresponding to Monitor Point Grid 16 and the transient HP Release 01. With the Link button activated in the graph, it will display whichever cell is selected (in blue) in the Monitor Point Data Window. In Figure 12 below, we can see the slower increase of concentration with time as this monitor point is slightly further away from the leak source and downstream.
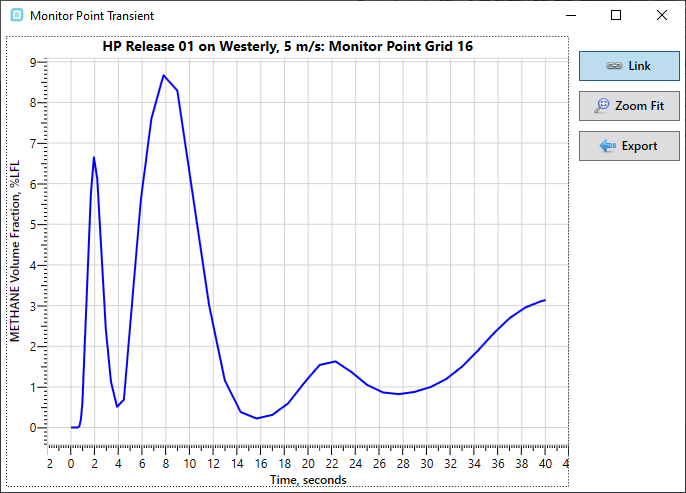
Tutorial 8 - Figure 12 - %LFL vs time for Monitor Point 16
-
These graphs and tabulated data can be exported to excel by clicking the
 button in the graph window.
The figure below shows the exported information for Monitor Point Grid 16.
button in the graph window.
The figure below shows the exported information for Monitor Point Grid 16.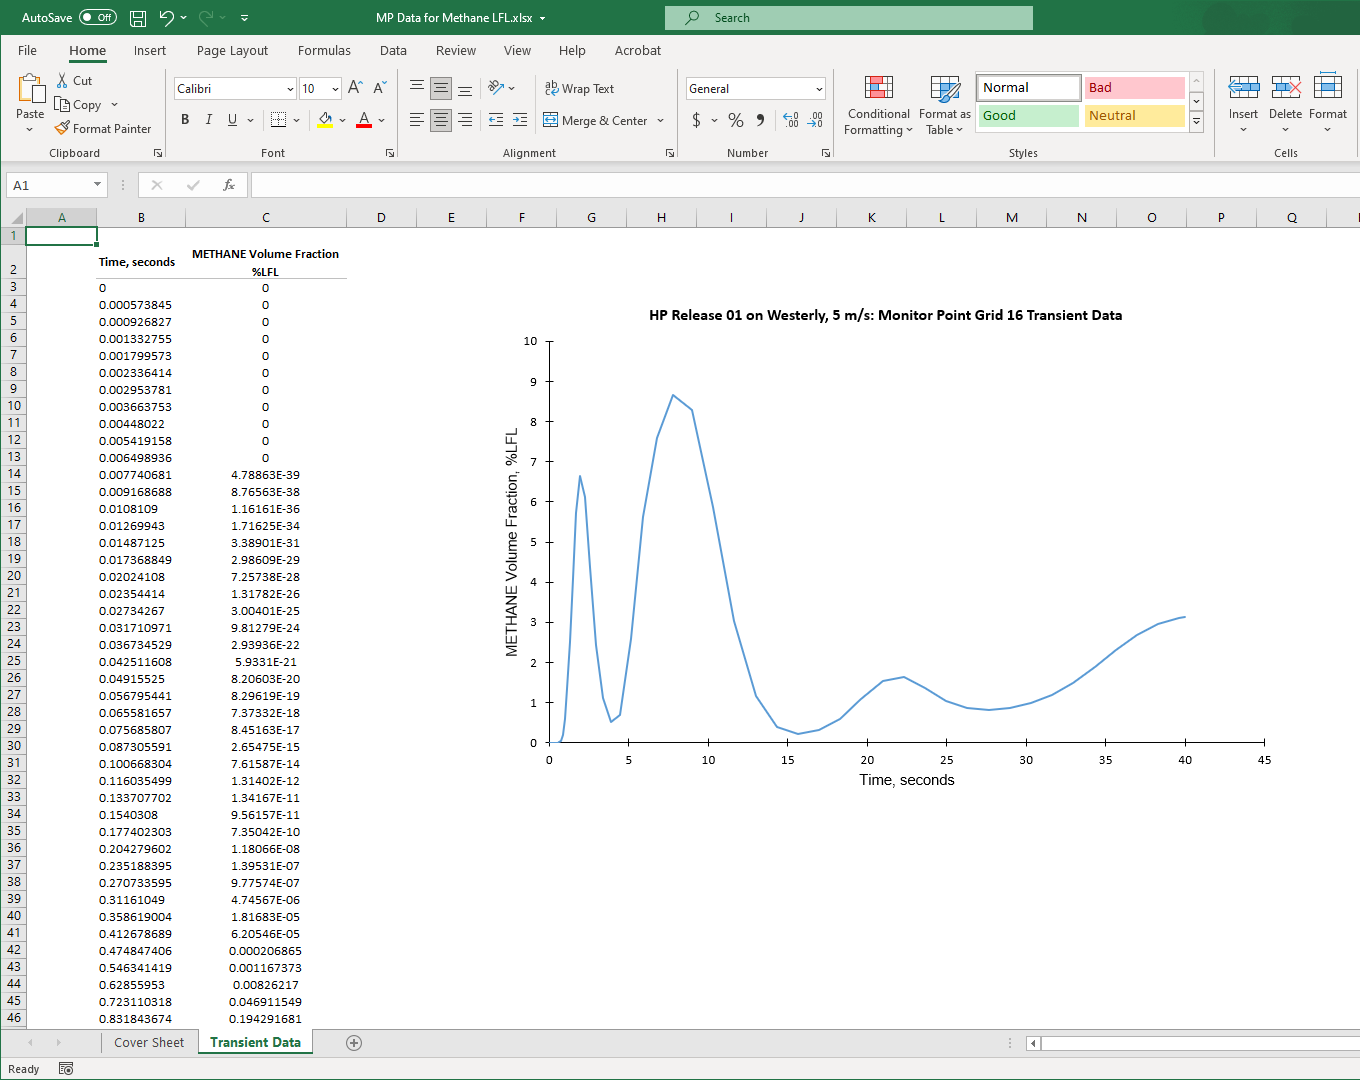
Tutorial 8 - Figure 13 - Excel document of exported data for the transient simulation
Rather than view the final concentration value in the individual cells of the Monitor Point Data Window, you can view the data set for any calculated time during the simulation. To view the monitor point data at a specified time, change the Transient dropdown menu to At Time and enter the desired time into the textbox that appears, the below figure is displaying data for t = 1 second.
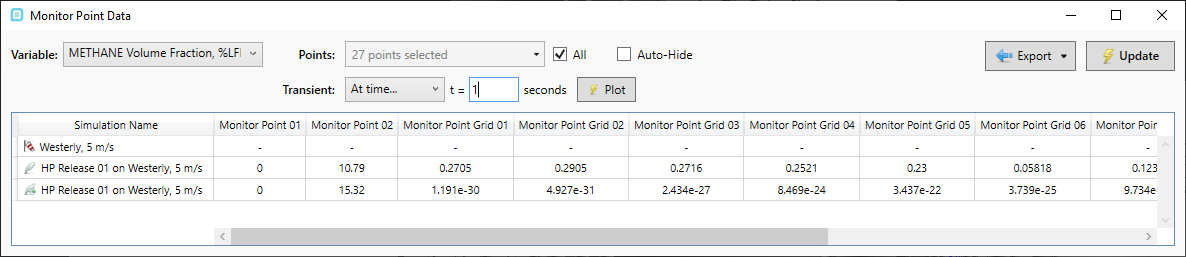
Tutorial 8 - Figure 14 - Setting the transient monitor point data to display values at 1 second