Running Dispersion Simulation with Internal Ventilations
Setting up a dispersion case with internal ventilations is done in the same way as with external ventilation case:
-
Right-click Dispersion Simulations in the Project Items tab and select Add Dispersion Simulation
-
Set the Ventilation as the Internal Ventilation simulation calculated earlier
-
Open the Inflow dropdown menu (Part a) and hold Ctrl on the keyboard and ensure each of the two inflows in the project is highlighted (Part b), as shown in the figure below. Doing this will display the text All Inflows in the menu.
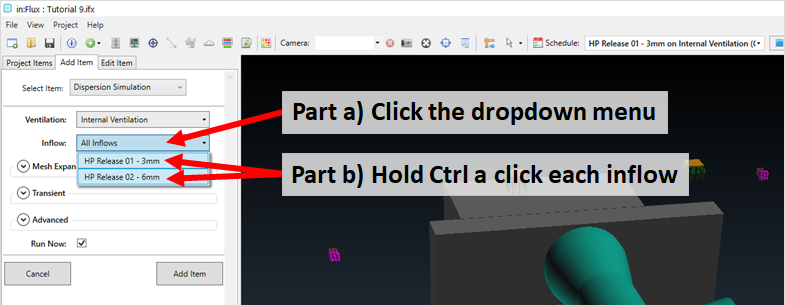
Tutorial 9 - Figure 33 - Selection of the two inflows - will result in two separate dispersion cases
-
Click the Add Item button. This will add the two dispersion cases: one with the 3mm leak and the other with the 6mm one.
After initializing, double click on the HP Release 01 - 3mm on Internal Ventilation case to open the simulation monitor. Turning on the mesh visibility and zoom into the leak location to see that even for a 3mm leak the mesh is quite refined.
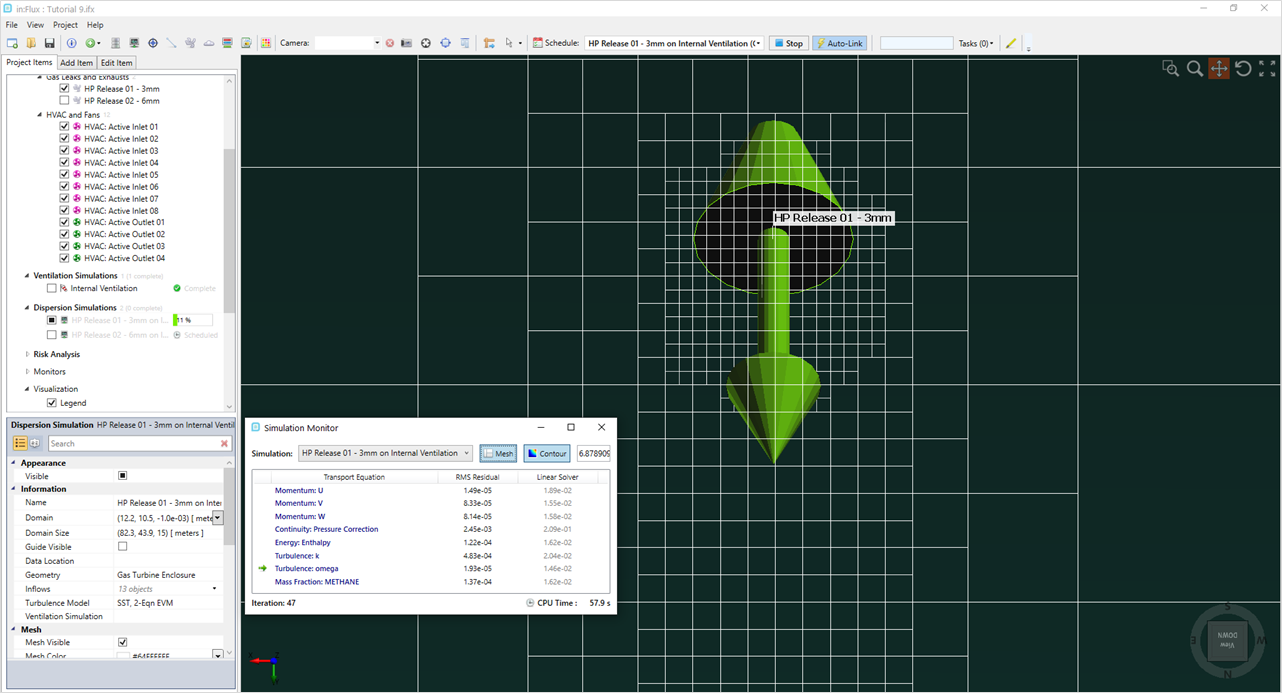
Tutorial 9 - Figure 34 - View of the 3mm leak mesh at 11% completion
Let both dispersion cases complete before continuing to the next section.