Defining a Custom Emission Dispersion
With the custom emission inflow defined and the two wind cases being solved, two dispersion cases can be setup and run.
From the Project Items Tab, right-click Dispersion Simulation and choose Add Dispersion Simulation. In the Add Items Panel use CTRL+Click to select both Ventilation cases (Easterly, 5m/s and Easterly, 2m/s) so that the dropdown text reads All Ventilation and click the Add Item button.
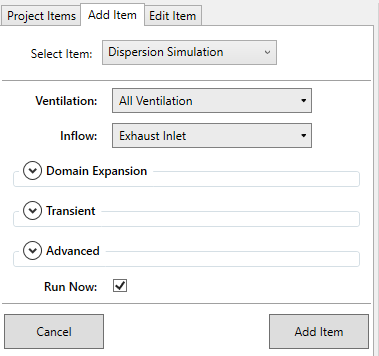
Tutorial 14 - Figure 08 - Add Item Panel for setting up dispersion case using all ventilation cases defined
This will setup two dispersion cases to be scheduled to run after the ventilation cases have completed calculating.
Let these two dispersion cases finish before continuing to the next section. While the calculation progresses, you can view the results from the completed ventilation cases by adding some contours and vectors to the project, like the ones shown below. Change the height of the offset and view how the wind profile changes near the exhaust inlet.

Tutorial 14 - Figure 09 - Viewing ventilation results while dispersion calculations are progressing