Importing an Image
We will start by importing an image to use as a template to draw on top of. For this tutorial an image of a blueprint drawing for an aircraft hangar will be used.
To import an image to the create geometry tool:
-
Click the Images tab shown in Image 2 below.
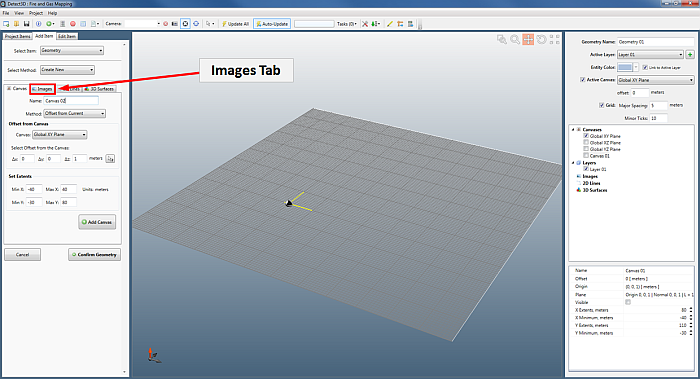
Image 2 - Indication of location of Images Tab for the create geometry tool
-
Select the Browse to Image button and navigate to the image file download with Detect3D or in:Flux Tutorial zip files titled - Hangar - for CAD Creation Tutorial.png and click Open.
-
Change the view to Top View by selecting it from the Camera dropdown menu. Or by selecting View From option when right-clicking in the viewport window. The window should now appear as Image 3 below.
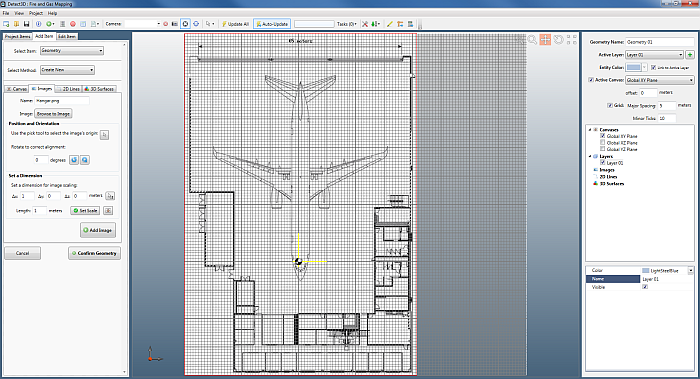
Image 3 - Hangar blueprint loaded onto created canvas.
-
There is a dimension indicated at the top of the loaded image. Zoom into the tail of the plane so that you can see the length indicated by the dimension (shown in Image 4).
-
Use the Vector Pick Tool
 and select the two points (-17.5, 38, 0) and (18, 38, 0) indicated in Image
4 below. The points should align with the locations the arrows of the image are points to indicating the dimension measurement. You may choose instead to enter 35.5, 0, 0 into the delta-x, delta-y, and delta-z text boxes, respectively.
and select the two points (-17.5, 38, 0) and (18, 38, 0) indicated in Image
4 below. The points should align with the locations the arrows of the image are points to indicating the dimension measurement. You may choose instead to enter 35.5, 0, 0 into the delta-x, delta-y, and delta-z text boxes, respectively.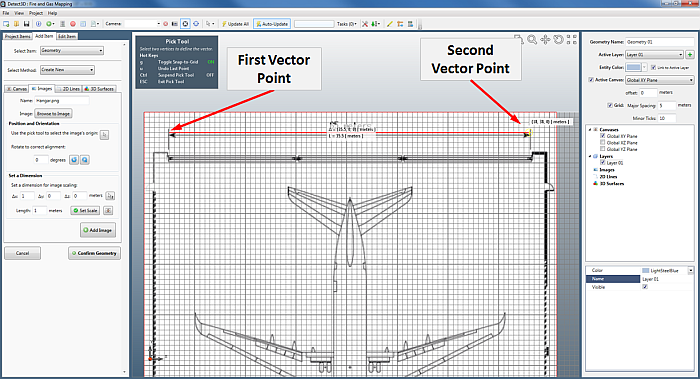
Image 4 - Zoomed in window indicating the two points chosen for the vector pick tool which will scale the image
-
Enter 65 meters into the Length text box under the Set a Dimension section as that is the value indicated by the dimension in the image.
-
Click the Set Scale button
 and the image is scaled to the correct length of the dimension in the image.
 -
Change the images origin by clicking the Pick Tool under the Position and Orientation section indicated in Image 5 and choose the point at the nose of the plane ( 17, 10, 0 ) shown in Image 6.
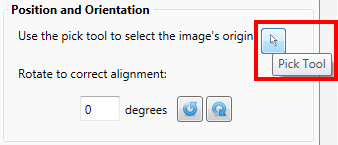
Image 5 - Pick Tool for selection of image origin
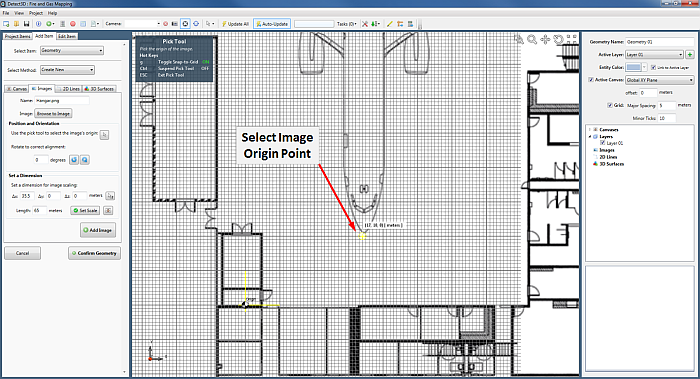
Image 6 - Point to select for re-positioned Image Origin
-
Click the Fit Active Canvas to Image
 next to the Set Scale Button which will set the active canvas length and width to match the scaled image length and width.
 -
Click the Add Image button to add the now scaled hangar image to the geometry project. Your screen should resemble Image 7 below.
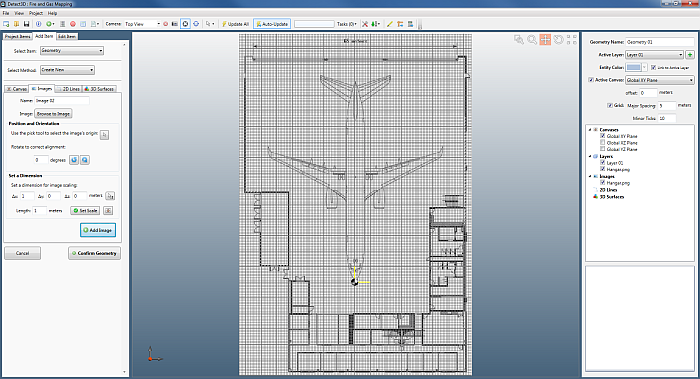
Image 7 - Viewport Window after hangar image has been scaled and origin set.