Third Detector
Rather than adding items by selecting points in the geometry, or manually entering coordinates, locations can be used to define a three-dimensional coordinate for future items in the project. For the third flame detector a location will be added to be used for defining the position of the flame detector. Once placed, locations can be chosen from the dropdown menus as points for detectors, and other project items. These locations can also be used as plausible detector locations for optimization analyses.
To add a location to the project:
-
From the Add Item tab choose Location from the dropdown menu.
-
Name this location “Location 01”
-
Leave the Method as Single
-
Click the Point Pick Tool button
 and select the installation pole in the north west corner, as seen in Figure 14 below, or manually enter the coordinates ( -0.13, 22.02,
3.59 )
and select the installation pole in the north west corner, as seen in Figure 14 below, or manually enter the coordinates ( -0.13, 22.02,
3.59 )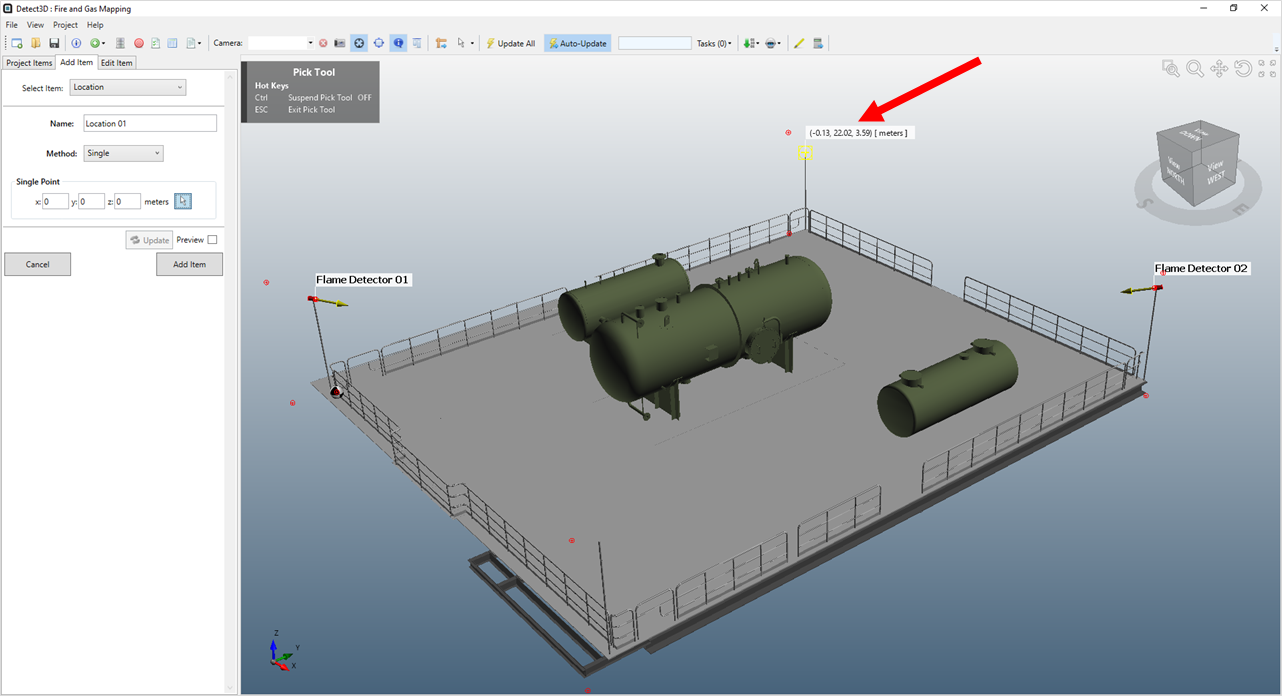
Tutorial 1 - Figure 14 - Position of Location 01
-
Select the Preview checkbox, the location is indicated in the 3D window by a label and three red intersecting lines.
-
Click the Add Item button, this will change the preview to yellow and add Location 01 to the project.
Adding the third flame detector to the project:
-
For the final detector for this tutorial, again choose Flame Detector from the Add Item tab and change the Name text box to “Flame Detector 03".
-
Now that you have already defined a location point, you may select it from the Location dropdown menu. Choose Location 01 from the dropdown menu as shown in Figure 15. The coordinates defined above for Location 01 are automatically entered to the x, y and z-coordinate text boxes.
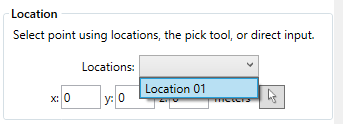
Tutorial 1 - Figure 15 - Selection of a defined location point
-
Enter an Azimuth angle of "135 degrees"
-
Enter a Declination of "10 degrees"
-
If warning signs appear, click the Forward Arrow
 once to nudge the detector to ensure it is in front of any geometry pieces
 -
Click Add Item to add the third flame detector to the project
Switch to the Project Items tab. The three flame detectors will be present under the Fire Mapping -> Flame Detectors heading in the project items tree. Click Flame Detector 03 in the project items tree (blue arrow below) to view its properties panel (bottom left of the window). Under the Appearance header of the properties panel click on or off the varying checkboxes so that Show Direction, Show Label, Show Model, and Visible are selected (red arrows).
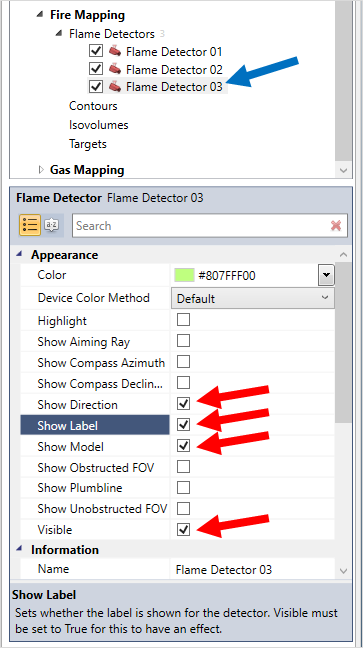
Tutorial 1 - Figure 16 - Using the Appearance section of the properties panel to change item visibility rather than right-clicking the item
The resulting 3D window should be similar to the figure below.
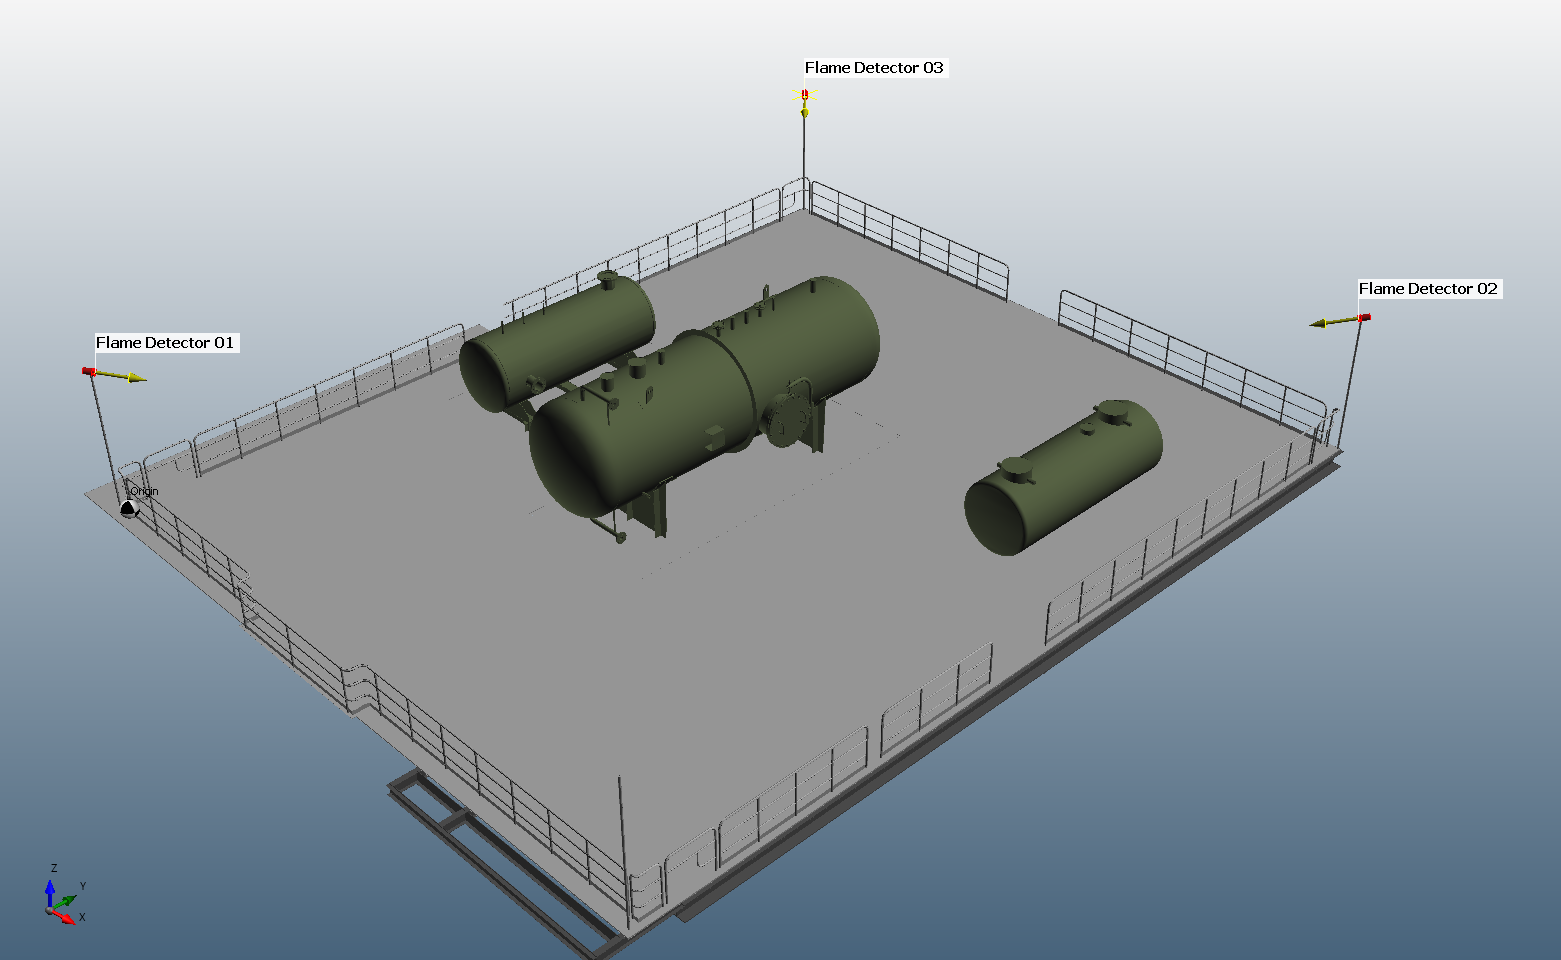
Tutorial 1 - Figure 17 - Displaying the three flame detectors without unobstructed fields-of-view