Cone Targets
Cone targets can be used to simulate pool and jet fires or can be defined around a valued section of your loaded geometry.
If you haven't already, turn off the visibility of the obstructed FOV for Flame Detector 01.
To place a cone target:
-
From the Add Item tab choose Target from the dropdown menu
-
Name the target as “Target 03 – 40kW Pool Fire"
-
Select Cone as the Type
-
Enter the coordinates ( 4.4, 9.9, 0 ) for Point 1
-
For the Point 2, enter the coordinates ( 4.4, 9.9, 1 )
-
Enter a Radius 1 value of "0.17 meters". This value represents the radius of the cone at the Point 1 coordinate. We use a value of 0.17 meter radius as that produces an area of a circle equivalent to a 1ft x 1ft pool fire, which is the standard size used by NFPA and FM Global when working with flame detectors. The height of the pool fire is assumed to be 1 meter here but you may change the z-coordinate for Point 2 if a different height is desired
-
Enter a Radius 2 value of "0 meters" which will become the top point of the cone. For the purposes of this tutorial a cone is used but you may opt to use a regular cylinder as the target. The top coordinate of the cone can also be offset from the base coordinate to add an angle to the cone's direction to simulate affect of wind on the pool fire
-
Click the Preview checkbox to ensure your target placement is similar to Figure 06 below
-
Click the Add Item button to add the cone target to the project
Return to the Project Item tab turn on the visibility of 0ooN Isovolume. You should see that the Target 03 - 40kW Pool Fire is partially covered by the isovolume (as shown in Figure 06), indicating that some of the detectors in the project may not see the cone target.
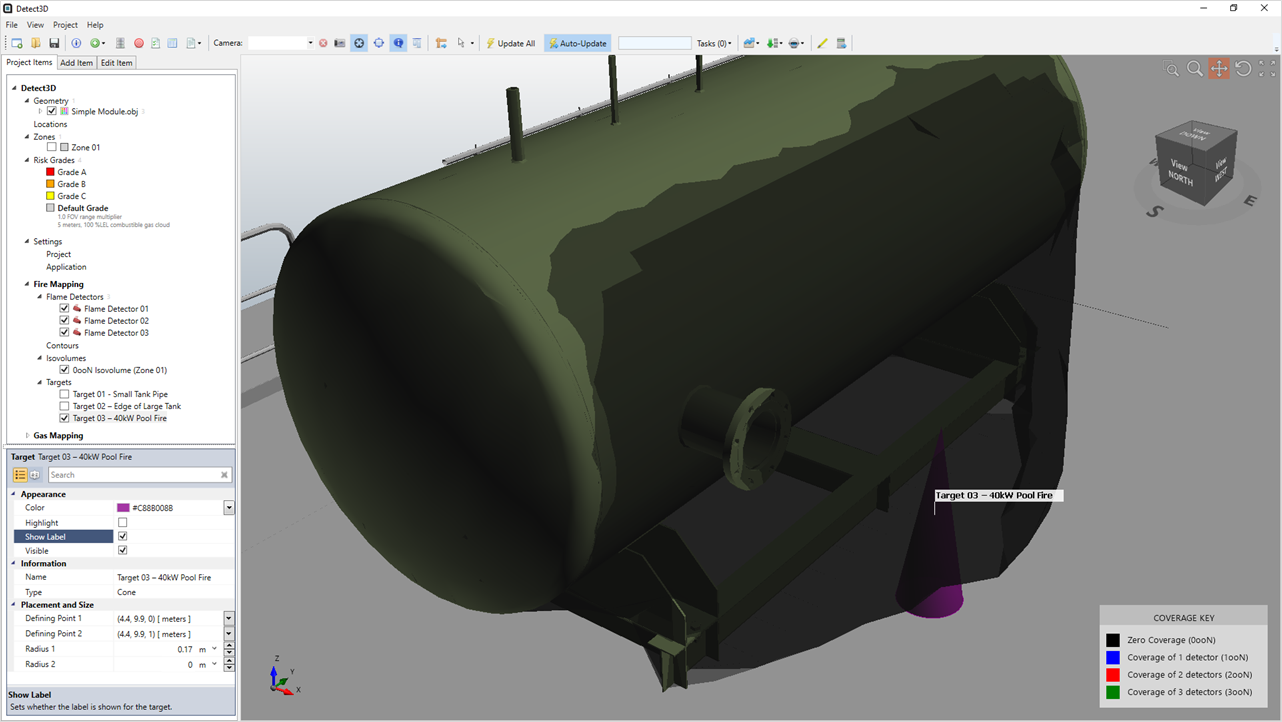
Tutorial 3 - Figure 06 - Cone target partially covered by the Zero Visibility isovolume
Upon selecting the target icon ![]() the table of results (below) shows that only Flame Detector 01 can see the cone target. Therefore, if Flame Detector 01 were to fault or be taken down for maintenance, a 40kW pool fire at this location would not be detected by any of the other flame detectors in the project. Reliability testing and optimizing of your detector layouts will be discussed in more detail in Tutorial 11.
the table of results (below) shows that only Flame Detector 01 can see the cone target. Therefore, if Flame Detector 01 were to fault or be taken down for maintenance, a 40kW pool fire at this location would not be detected by any of the other flame detectors in the project. Reliability testing and optimizing of your detector layouts will be discussed in more detail in Tutorial 11.
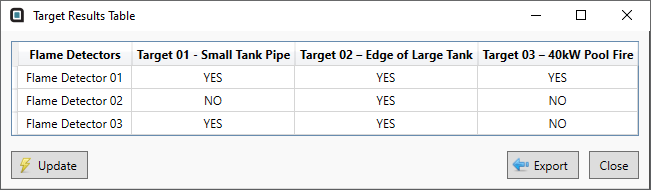
Tutorial 3 - Figure 07 - Updated Target Results Table Window
You can also simulate a simplistic jet fires in Detect3D by combining two cone targets. The combined targets will display separately in the target results table but still give a visual representation as well as data in the Target Results Table (as shown below).
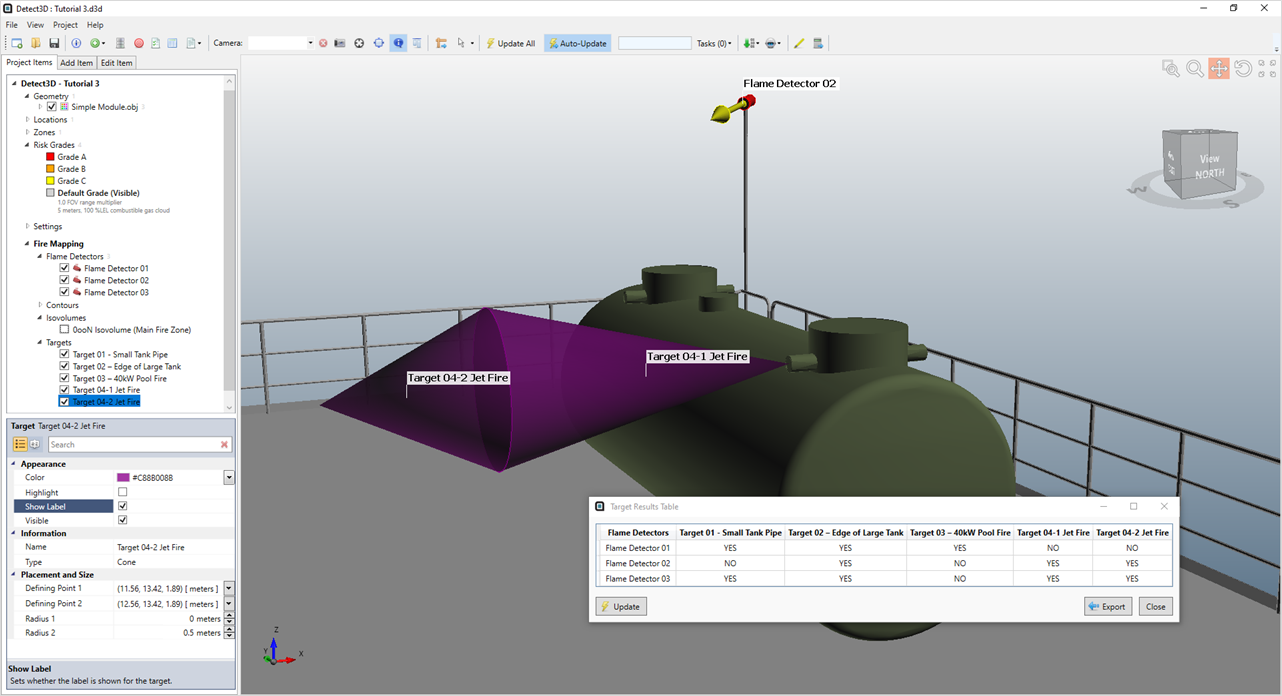
Tutorial 3 - Figure 08 - Example of jet fire target in Detect3D