Importing Detectors from Excel
Rather than individually add detectors one at a time, multiple devices can be imported via Detect3D's Excel Detector Import function. This feature is useful for projects with large detector counts where entering detectors manually becomes too tedious. Flame detectors, point gas detectors, open-path gas detectors and acoustic gas detectors can all be imported this way.
The excel file used below is included in the Detect3D Tutorials.zip (22MB)
This section will import three flame detectors from an excel file to use with the tutorial:
-
From the File Menu, select Import Detectors from Excel
-
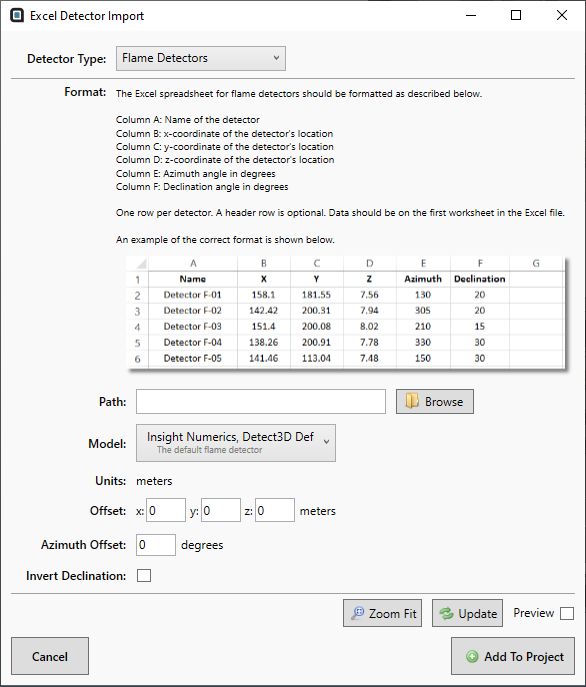
In the window that appears (Figure 23), the format needed for the excel file is shown. The downloaded file is already in this format.

Tutorial 4 - Figure 23 - Excel Detect Import window
-
Click the Browse button and navigate to the location of the downloaded excel file.
-
If successful the Preview checkbox will automatically be turned on and a pop-up window will appear stating that three detectors were found in the file. Click OK to close the pop-up window
-
Set the Model as the Insight Numerics, Detect3D Default detector. If you have already added FOV models, they can be selected here.
-
Leave the other parameters as the default values
-
Click the Preview checkbox to verify that the detectors will be imported in the corners of the Complex Module.obj and click Add To Project
The three flame detectors in the file will then be imported into the project and their obstructions calculated. If any project items have a gray font after import, press the Update All button on the toolbar to update all the zones and sub-zones calculations in the project.
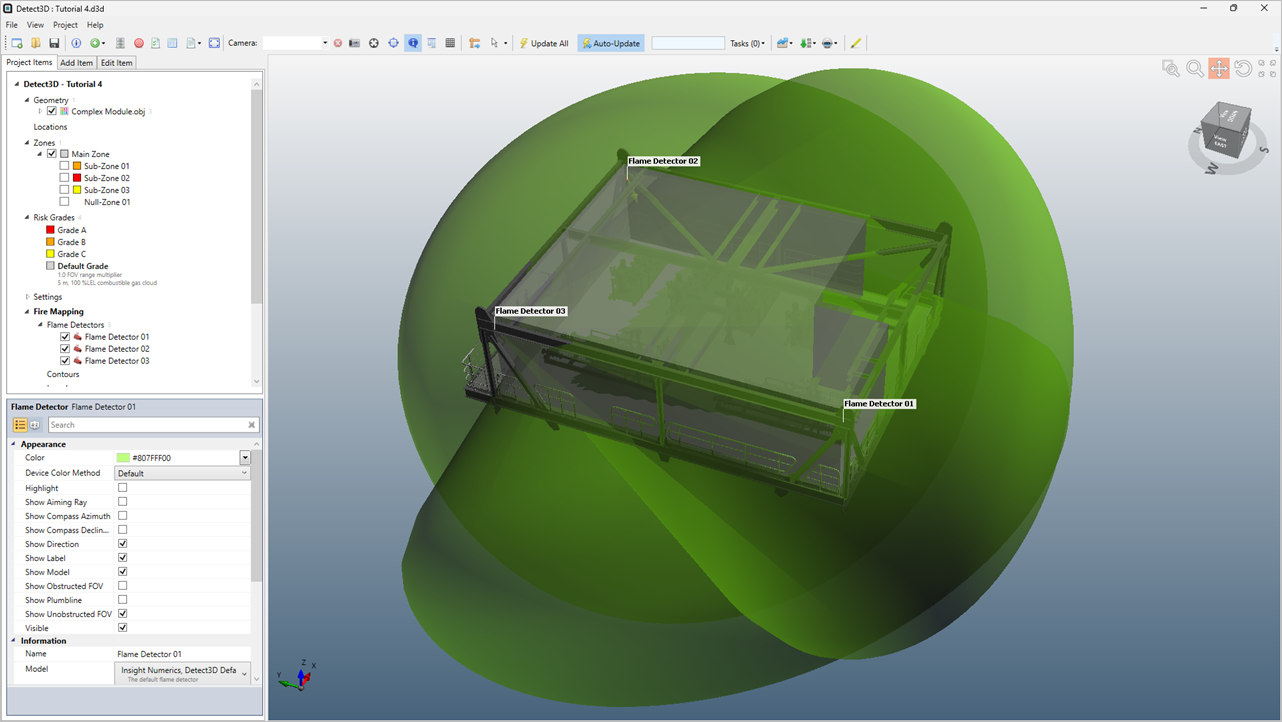
Turn on the labels of each of the detectors to recreate Figure 24 below.

Tutorial 4 - Figure 24 - Imported flame detectors from the downloaded Excel file
Before continuing, toggle off the visibility of the Main Zone and the Unobstructed FOV for each of the detectors.