FOV Model Creation Variables
-
Select Field of View (FOV) from the dropdown menu in the Add Item tab.
-
Change the Manufacturer text box to “Tutorial 10”
-
Change the Model text box to "Detector 0123”
-
Set the Description text box to "Example Detector from Tutorials", you can use this space to add other criteria for the field-of-view e.g. fire type, fire size, sensitivity, etc.
-
Once you have made several models you may want to use a previously created model as a template, this can be selected from the Use As Template dropdown. As an example a FOV model might have different maximum ranges for different sensitivity settings but all other curvature values are the same, for this using a template is beneficial. For this tutorial , leave the template dropdown as blank or not defined.
-
Follow the next pages of this tutorial for information on the 10 variables to change the curvature of the Field-Of-View (FOV).
-
For flame detector field-of-views the Type should always be set to Rotated (Standard). Due to the popularity of CCTV and gas detection cameras, a new Swept (Camera) option can be selected and is described in the advanced features section.
Note: many of the terms used in this tutorial were create to help discern varying angles for FOV curvatures. There is no industry standard for describing this curvature so follow the links to view what each term represents.
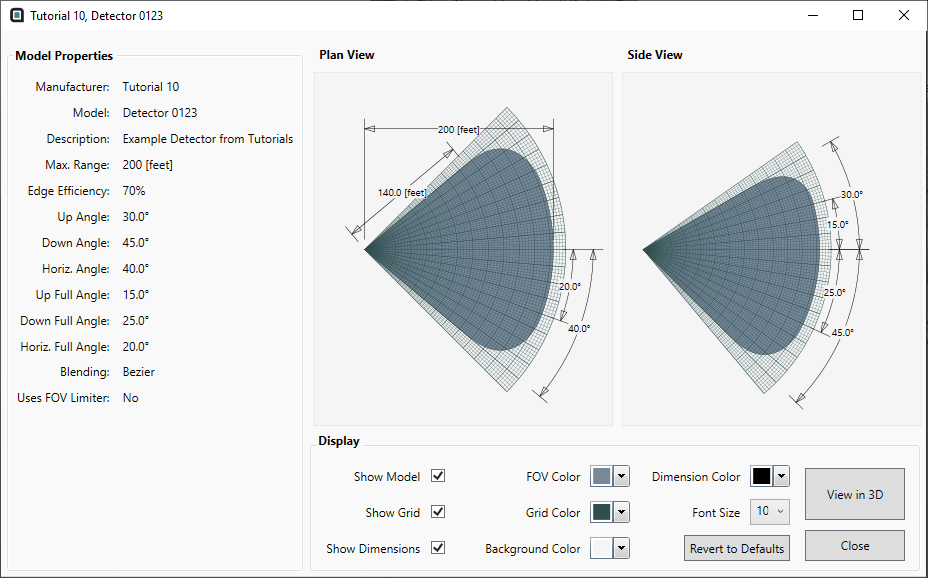
Selecting the preview checkbox for the model will open the window shown below, colors and properties of the viewer can be changed for ease of viewing. The remaining seven criteria defining fields-of-view will now be discussed.

Tutorial 10 - Figure 01 - Preview of Tutorial 10 flame detector FOV model
Contents of FOV Model Creation Variables Section: