Reactions for Fire Simulations
For any fire simulation, a combustion reaction occurs. The type of reaction depends on the fuel. The most common fuel is a hydrocarbon that can be expressed in the form CxHy. When this hydrocarbon reacts with oxygen, CO2 and water are produced.
The general case of a hydrocarbon reaction is:

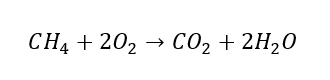
For example, the combustion of methane (x = 1, y = 4) is as follows:
Fuels can be of different types but require different reactions to capture the correct chemistry. If a fuel can be expressed in the form CxHyOz, then the general form of the reaction is:

For example, the combustion of ethanol (x = 2, y = 6, z = 1) is as follows:

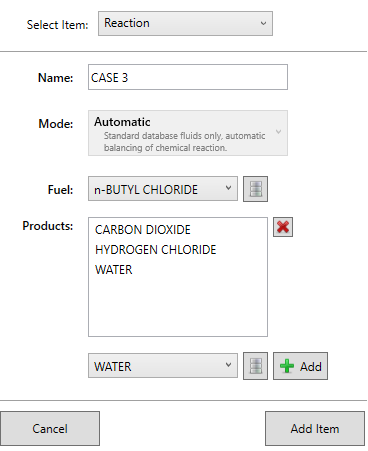
More complex reactions can also be included, where the fuels cannot be expressed in these standard forms. In these cases, the user must provide both the fuel and the products, as shown in the example with hydrogen chloride below. If the fuel and products are all in the standard DIPPR® fluids database, in:Flux will attempt to balance the equation. However if either fuel or products are user-defined fluids, the user must manually balance the equation then enter it by selecting User-Defined as the Mode.
The heat released by the reaction is automatically calculated in all cases except where user-defined fluids are used as a fuel or in the products. For these cases, the user must provide the heat of reaction after manually balancing the reaction.
Adding a Reaction for a fire simulation:
-
Create the multi-component fuel from the Fluids Database. This is the same process as creating a multi-component gas. Alternatively, you may select a single fuel from the the DIPPR® Liquids Database.
-
Add the inflow with the chosen or defined fuel as the fluid
-
Create a user-defined reaction for the fuel (if not HC or HCO type)
-
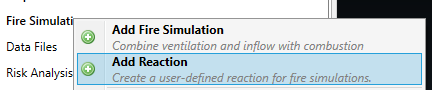
right-click on Fire Simulations and select Add Reaction, or select Reaction from the Add Items Tab
-
Add the fuel and the products from the chemical reaction and then select Add Item. It is suggested to use the Automatic option as the Mode. If you have the moles of oxidant as well as the moles and heat of reaction for each product, then the User-Defined can be used.
-
-
Defined Reactions will be listed in the Project Items Tab

-
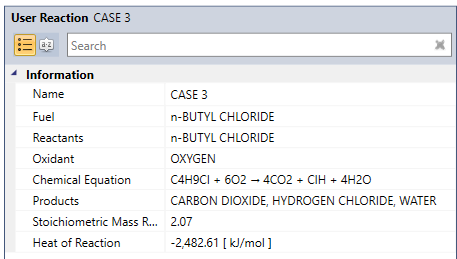
The properties panel for the reaction will display the calculated reaction based on the balance of fuel and products.
-
After completing steps 1 to 3, fire simulation can be run with the defined inflow. The fire simulation will use the defined reaction for the fuel as it was selected when defining the inflow. All other post-processing functions are the same as the normal fire simulation cases.