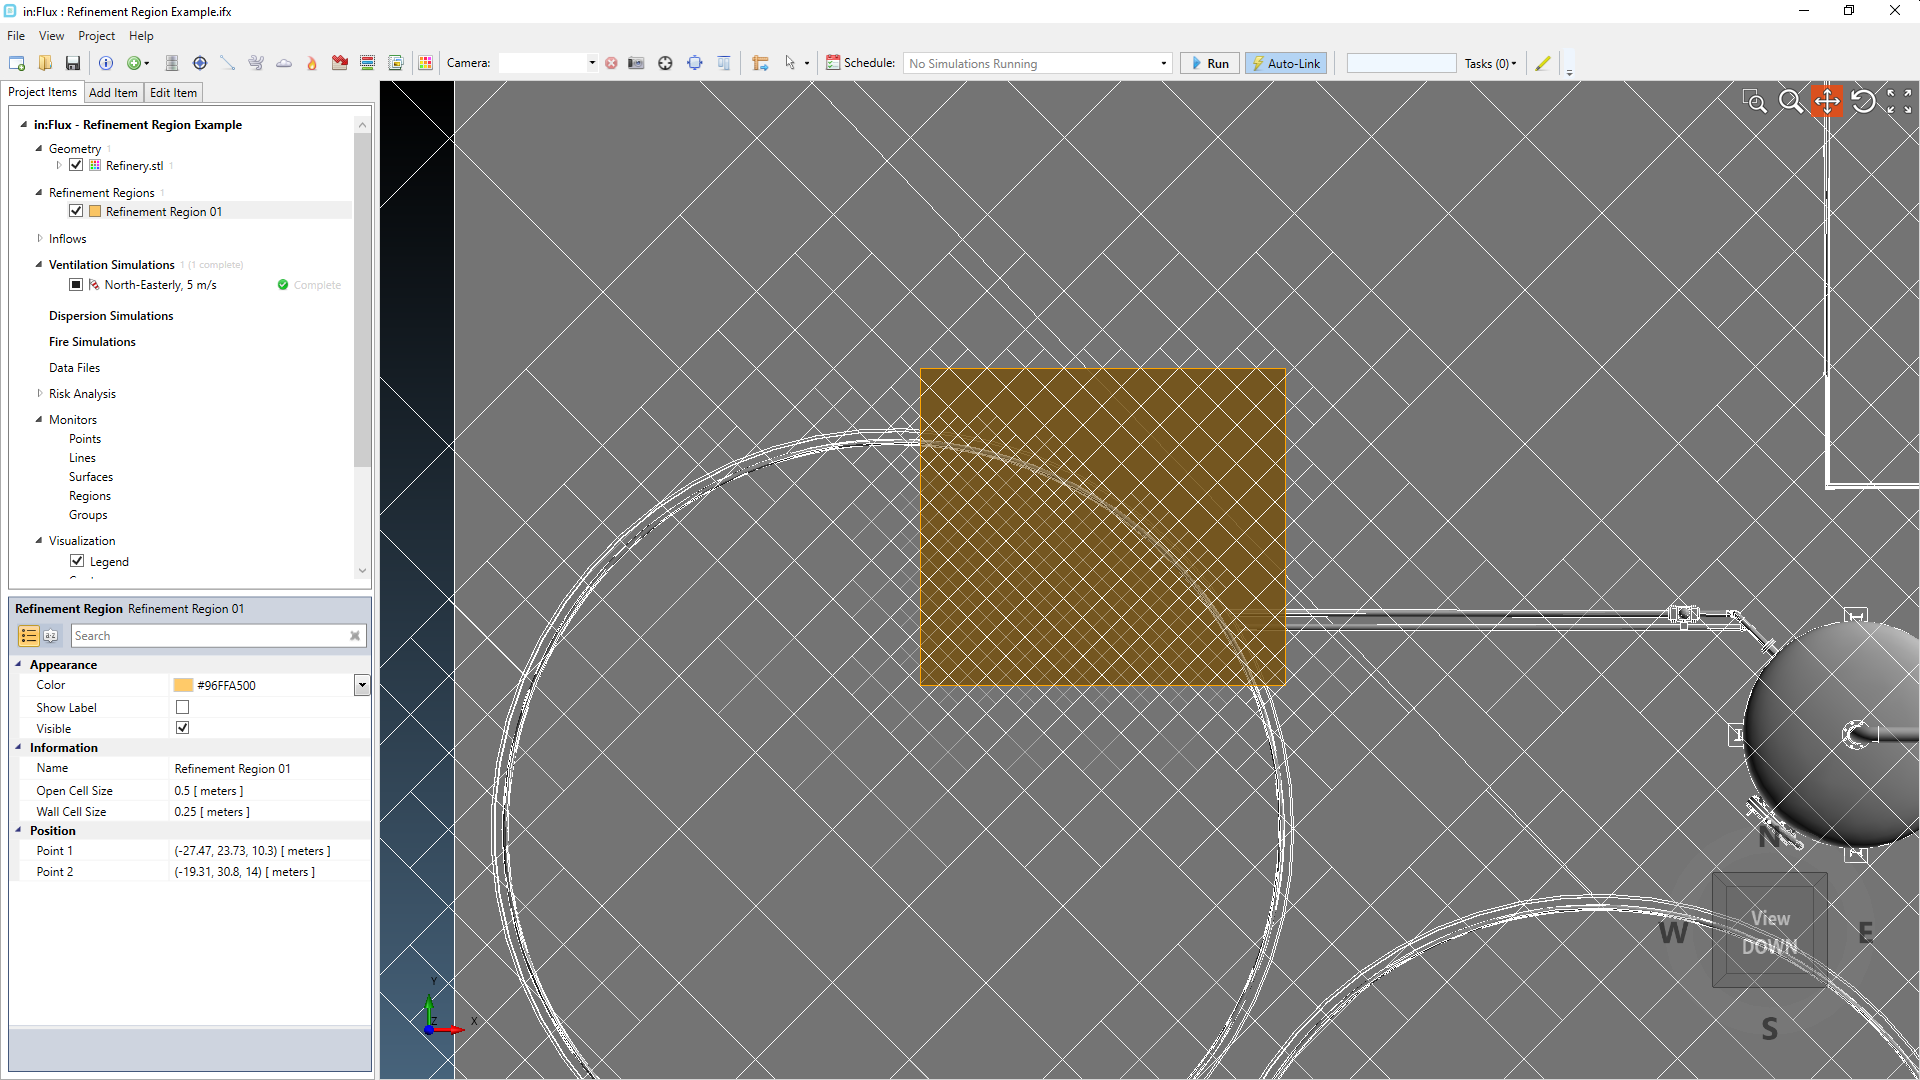
Refinement Regions
in:Flux is designed to automated meshes, starting from an initial mesh and then adding cells where needed as the solver progresses. This not only provides a high level of automation but maintains a high level of accuracy with lower computation times.
It is recommended to use the mesh automatically generated by in:Flux for your project.
In some rare cases, users may want to add mesh refinement in a particular location of the project. For these rare cases you may follow the steps below to add a refinement region to the project. This capability is only available in in:Flux v3.0 and beyond.
Disclaimer
Adding a refinement region to your project can significantly increase computation time and memory usage for your project. It is recommended to first use the automatically generated mesh and then if necessary, use the Default option for the refinement region.
Refinement Regions should be added to the project before simulations start, otherwise they will have to be reset and re-run.
Adding a refinement region to your project
-
First, run the simulation as normal (without refinement regions) to see if a refinement region is needed, in most cases a refinement region will not be necessary.
-
If is it deemed a refinement region is needed, right click the simulation and choose reset then continue to the steps below.
-
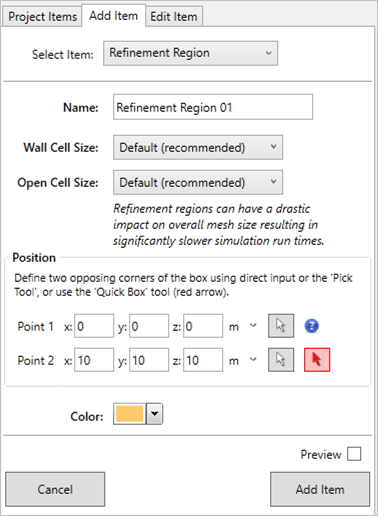
From the Add Items Tab select Refinement Region from the dropdown menu
-
Refinement regions are cuboid in shape and defined in the same way as monitor regions. This can be done by either:
-
Using the two pick tools
 to select the opposite corners of the cuboid region. Generally, it is best to set the 3D window to "top view" and use the
pick tools to select the x and y coordinates before manually entering a z-value for the height.
to select the opposite corners of the cuboid region. Generally, it is best to set the 3D window to "top view" and use the
pick tools to select the x and y coordinates before manually entering a z-value for the height. -
Using the Quick Box Tool (
 ), defining the cuboid with three
clicks of the mouse (starting point, x and y bounds points, then height).
), defining the cuboid with three
clicks of the mouse (starting point, x and y bounds points, then height).
-
-
Click the preview button verify the entered coordinate information.
-
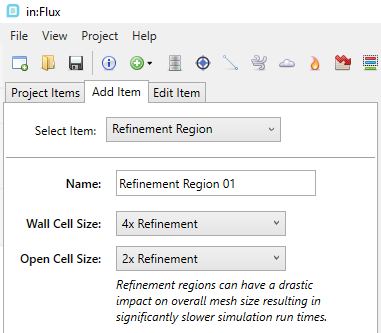
Next the mesh refinement cell size can be entered. It is recommended to leave the wall and open cell size to Default, as shown below, which will add refinement based on the initial mesh.
-
You may opt to change the wall cell size and open cell size to 2x Refinement or 4x Refinement, or a User-Defined value. A different selection can be made for the wall or open size, as shown below. It is highly recommended to use the Default option first and then proceed to using the 2x Refinement if needed and then 4x Refinement if needed before entering a User-Defined value. If you determine that a user-defined value is needed and have a small (<40m region) it is recommended to use the default values of 0.5m for the wall cell size and 1m for the open cell size. Changing the cell size to smaller values will result in significant increase in computation times. Additionally, it is possible that small cell sizes can result in long initialization phases, even for machines with >64GB ram. Take caution when changing these values.
-
-
Once the bounds of the region and cell sizes have been entered, click the Add Item button
-
The refinement region will now appear in the Project Items tab and can be selected when defining a new ventilation case.
Adding the refinement region to a ventilation case
-
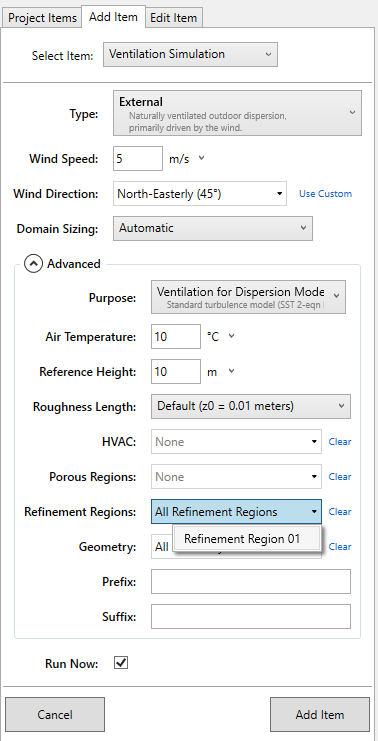
With the refinement region defined, select Ventilation Simulation from the Add Items Tab.
-
Choose a wind speed and wind direction for the case
-
Expand the Advanced panel, in the Refinement Regions field, choose the region defined earlier from the dropdown options. If only one region has been defined, then All Refinement Regions will appear. If several regions are defined, a sub-set can be selected by using Ctrl+click
-
With the refinement region selected and wind speed and direction entered, click the Add Item Button to add the ventilation case to the project.
-
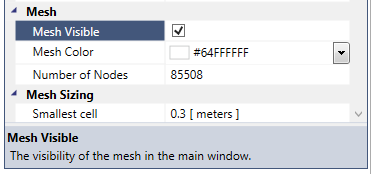
While the calculation progresses, you may view the currently calculated mesh by select the case and clicking the Mesh Visible checkbox from its properties panel.
-
The refinement region will be applied to the associated dispersion and fire cases which use the ventilation case with the defined refinement region.
Things to Consider
-
try and review an initial case with the automatically generated mesh (without any refinement regions)
-
if a refinement region is needed, first use the Default option for cell size
-
if more refinement is needed, use the 2x or 4x refinement options
-
be wary of manually entering small <0.5m cell sizes which can result in long computation times and memory issues
-
in most cases refinement around the wall of the refinement region is of concern. For these instances, try setting the Open Cell Size to Default and testing the 2x and 4x options for the Wall Cell Sizes