Save Camera Position and Batch Image Output
Saving Camera Position
Occasionally, it becomes tedious and cumbersome trying to position the 3D window in exactly the desired spot. To facilitate report writing and positioning within the 3D window, a save camera option can be selected from the View Menu or by right-clicking
in the 3D window and choosing Add Camera (  ).
).
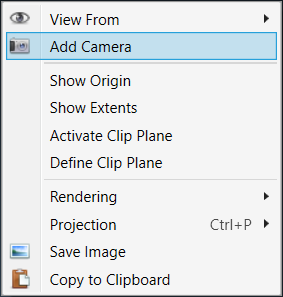
Tutorial 6 - Figure 33 - Selection of the Add Camera option in the right-click menu of the 3D window
Upon selection, in:Flux will prompt you to name the camera window to be saved.
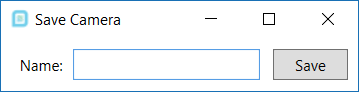
Tutorial 6 - Figure 34 - Save Camera name window
Once saved, you can then select the named camera angle in the Camera dropdown menu on the toolbar, or by right-clicking in the 3D window and selecting it from the View From ( ) option. You will notice that there already are some figures listed in the tutorial save files, these correspond to the figure numbers in the tutorials.
This feature also becomes useful when creating reports. You may save each camera as a figure in your report so that you may refer back to it later if a simulation has changed or you are comparing two simulations with the same view.
Batch Image Output
When working with projects with large number of simulations it becomes useful to quickly create a series of images for all the simulations present. For in:Flux this can be done using the Batch Image Output capability which is used in Tutorial 10.
The Batch Image Output can be accessed via the Project Menu or by selecting this icon on the toolbar.
![]()
Tutorial 6 - Figure 35 - Location on toolbar of the batch image output
This feature takes the current 3D window camera view and a defined visualization(s) and outputs images for all the completed simulations. To export a batch set of images:
-
Select the Batch Image Icon from the toolbar
-
In the window that appears, choose an output folder location
-
You may also enter a prefix or suffix to the names of the exported images or simply leave them blank
-
Select the visual(s) you want displayed in the exported image and check the tick-box if you want the mesh visible.
-
If there are transient simulations, you have options to save the final image, the image at a specific time, or at all time steps.
-
-
Choose which simulations you want export images for
-
Click Output
in:Flux will then toggle the visualization(s) selected and add them to each simulation, saving a PNG image for each case. A small splash window will appear showing the progress of the Batch Image Output.

Tutorial 6 - Figure 36 - Batch Image Output processing window
The exported images will be labeled according to the name of the simulation.
As an example, in the below image, the Tutorial 5 save file was used. The desktop was chosen as output folder, then the visualizations of the Methane Mass Fractions at 100%, 50%, and 10% LFL were chosen. Lastly, all the high pressure releases in the project were selected before pressed Output at the bottom of the window.
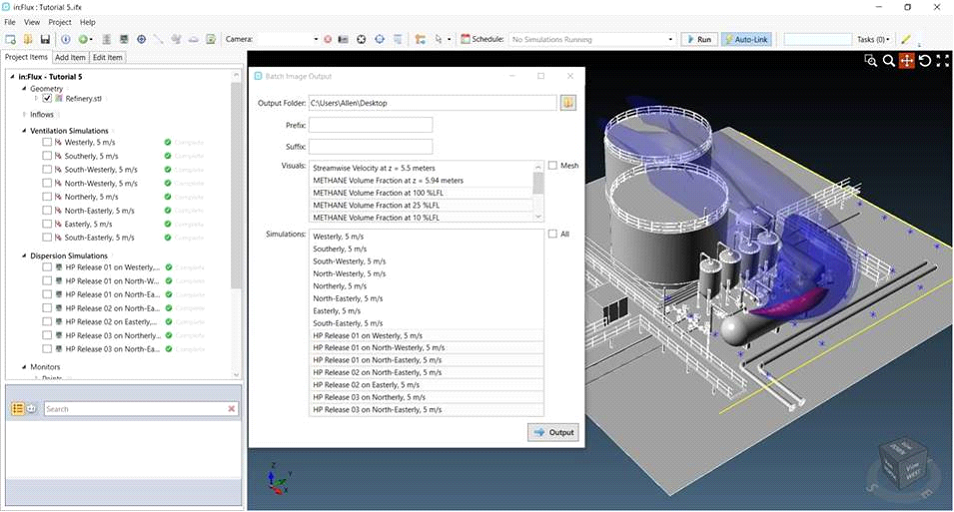
Tutorial 6 - Figure 37 - in:Flux window with Batch Image Output capability open