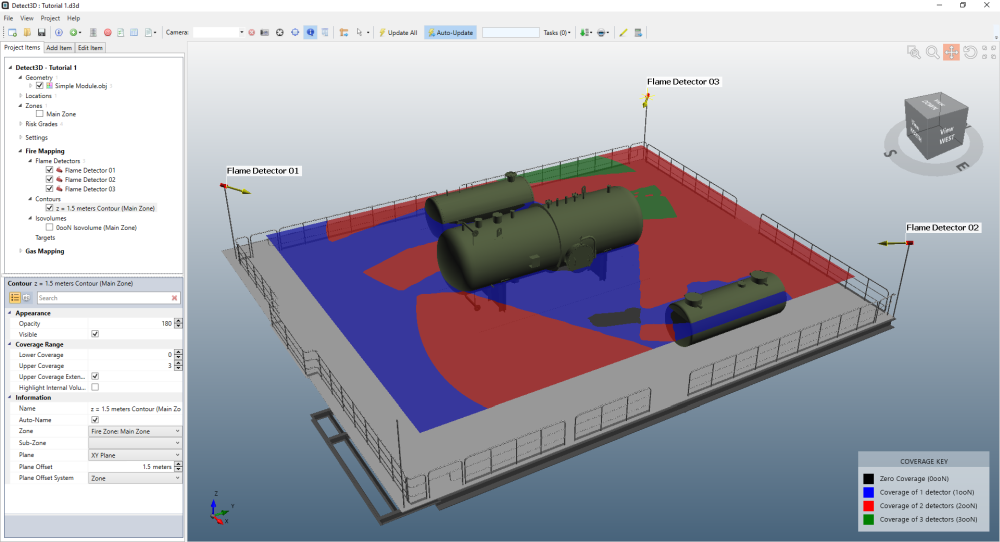
Tutorial 1 - Flame Detector Project

This tutorial will assist you in placing multiple flame detectors within the project and will then help you see the varying levels of coverage within a defined fire zone. You will add contours and isovolumes in order to visualize areas of the fire zone which are seen by 0, 1, 2, or 3+ flame detectors.
Learning objects for this tutorial include:
-
How to add objects to a project using the pick tool, defining locations, and entering coordinates
-
How to add contours
-
How to add isovolumes
Files used in this tutorial:
-
Simple Module.obj (2.2 MB)
The CAD model is located in the tutorials folder of the Detect3D directory (usually C:\Program Files\Detect3D\Tutorials depending on the folder chosen during installation). Alternatively, you can load the "Simple Module (.obj)" by selecting it from the Load Sample Geometries option in the Help Menu.
Contents of Tutorial 1: