Defining a Risk Data Set
Before the 132 CFD cases are run, a Risk Data Set and a monitor region should be defined. Both of these can be added after the simulations have completed but it will take some time to extract the necessary data needed for Risk Data Sets and monitors (upwards of 3 hours in some instances) so its best to define before running simulations.
A Risk Data Set is used to define a region in which to collect the combined results for a specific variable. For example, a Risk Data Set for the Methane, %LFL variable can be used to create an exceedance contour showing regions having more than 20% LFL of methane gas. The Risk Data Sets also defines the region in which gas detector optimization can be performed.
Multiple Risk Data Sets can be added to the same project, each with a different variable assigned. However, for large projects it is advised to only add one or two risk data sets in the project. Adding multiple risk data sets will significantly increase the project file size and on occasion max out memory capacities for some computers so be wary when adding multiple of these regions.
The risk data set will also save the consequence value, meaning projects with more than one risk data set can assign different consequence values to the same simulation, e.g. one for toxic analysis and one for flammable gas
To define a Risk Data Set:
-
From the Add Items tab, choose Risk Data Set from the Select Item dropdown menu
-
Enter a Name for the set such as "Risk Data 01"
-
Choose a Variable for the Risk Data, for this example "Flammable Gas Volume Fraction, %LFL" will be used.
-
Select All Dispersion Simulations as the Simulations to be used for the data set.
-
Enter the two definition points of the Risk Data Set as ( 15, -6, 0 ) for Point 1 and ( 83, 55, 20 ) for Point 2, or use the
 button to create a region similar to the figure below.
 -
Here you can set the consequence weighting as well. However this is described further in a later section. Entering this information now will tell in:Flux to save certain information for each simulation run so the post-processing is quicker later on. These fields can also be changed after simulations are complete. Leave the default settings as they are for this tutorial, which is a typical setup for a flammable gas project:
-
Method: Monitor Region Volume
-
Volume: Volume (LFL-100%)
-
Normalization: Relative to Average
-
Scaling: Cube Root
-
-
Leave the Advanced tab alone for now. These features are described more in this section but are left as is for this tutorial.
-
Click the Add Item button.
-
in:Flux will then prompt you if a Monitor Region should be defined, click YES to continue. This will add a monitor region with the same bounds as the risk-data set. This is an important step as the monitor region can be used to determine the consequence for each case simulated, discussed later.
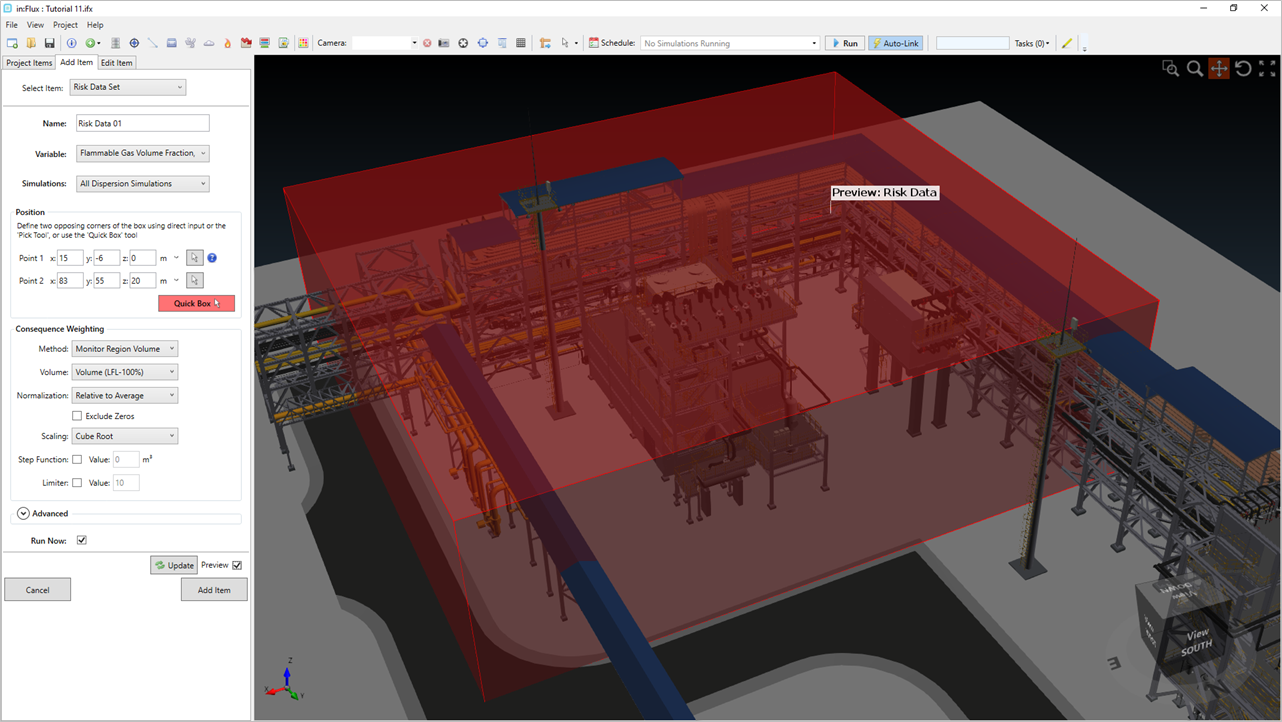
Tutorial 11 - Figure 20 - Risk Data Set definition region
Once defined the Risk Data Set and Monitor Region will have gray text in the properties panel. As simulations calculate their information will be updated automatically as they were defined BEFORE simulations started calculating. Otherwise, in:Flux does not know what variable to keep watch of throughout the analysis and it will need time to extract that from each simulation case if added after simulations have complete. If you need to add or update a risk data set after simulations are complete, ifx:Solve may be used to expedite the process of updating project data.
Your project should now have 132 CFD cases defined (12 ventilations and 120 dispersions) as well as a Risk Data Set and a Monitor Region.
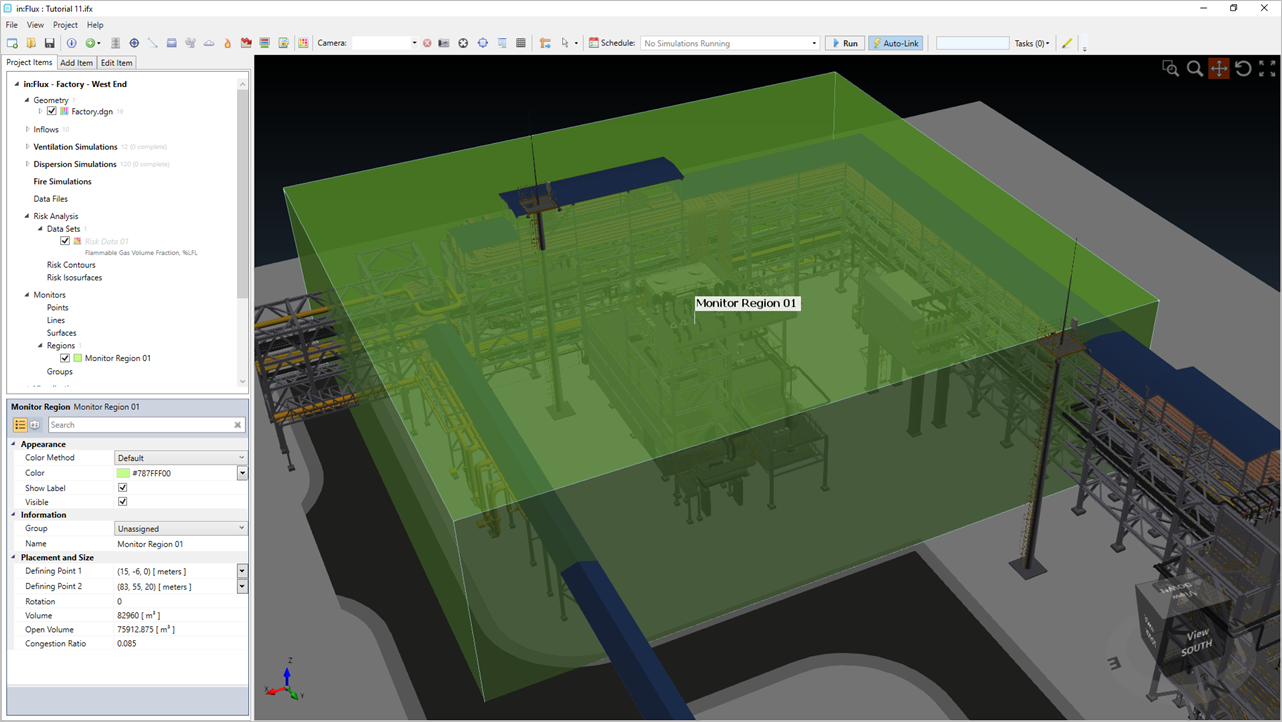
Tutorial 11 - Figure 21 - Monitor Region defined in the project with the same bounds as the risk data set
Save your project before continuing.